> ## Documentation Index
> Fetch the complete documentation index at: https://coss-mintlify-7c00cc7c.mintlify.site/llms.txt
> Use this file to discover all available pages before exploring further.
# Routing with Round Robin and Attribute Matching
This guide walks you through how to set up a Round Robin Team Event that routes bookings to team members based on attributes using Cal.com's Routing Forms.
Attributes are only available in Organizations Plan and Enterprise Plan
***
## Setting Up a Round Robin Team Event
1. **Ensure a Team exists**
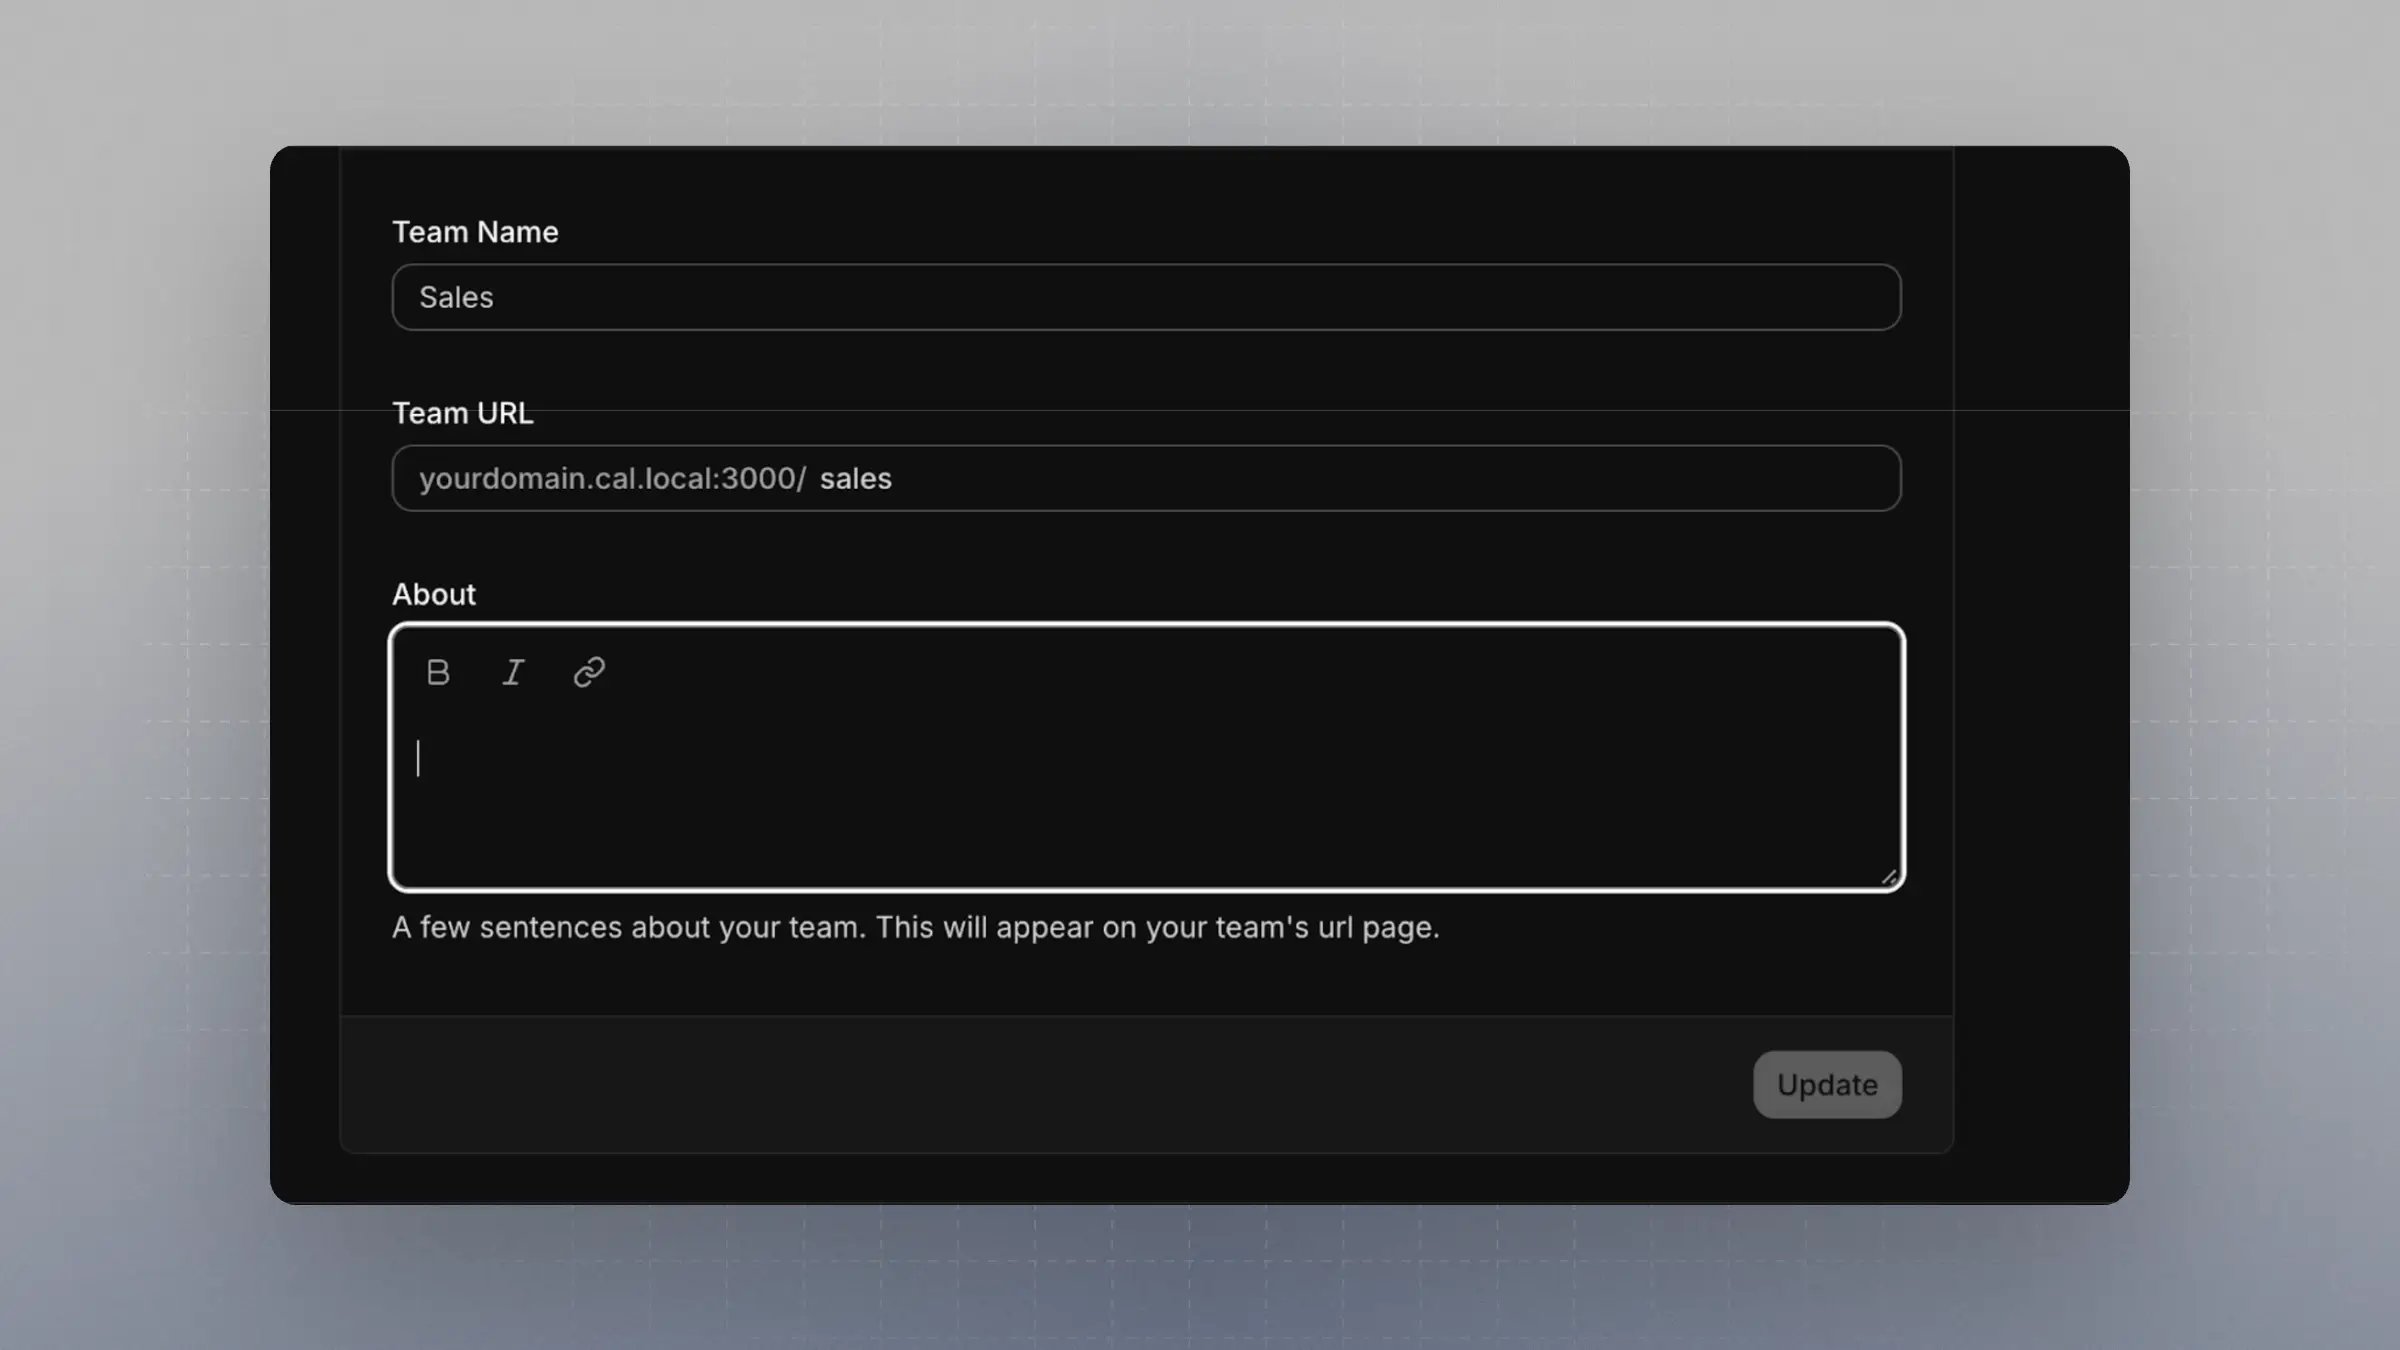
If not already created, go to your organization and create a Team. For example, a team named `Sales` with the slug `sales`.
 2. **Create a Round Robin Event Type**
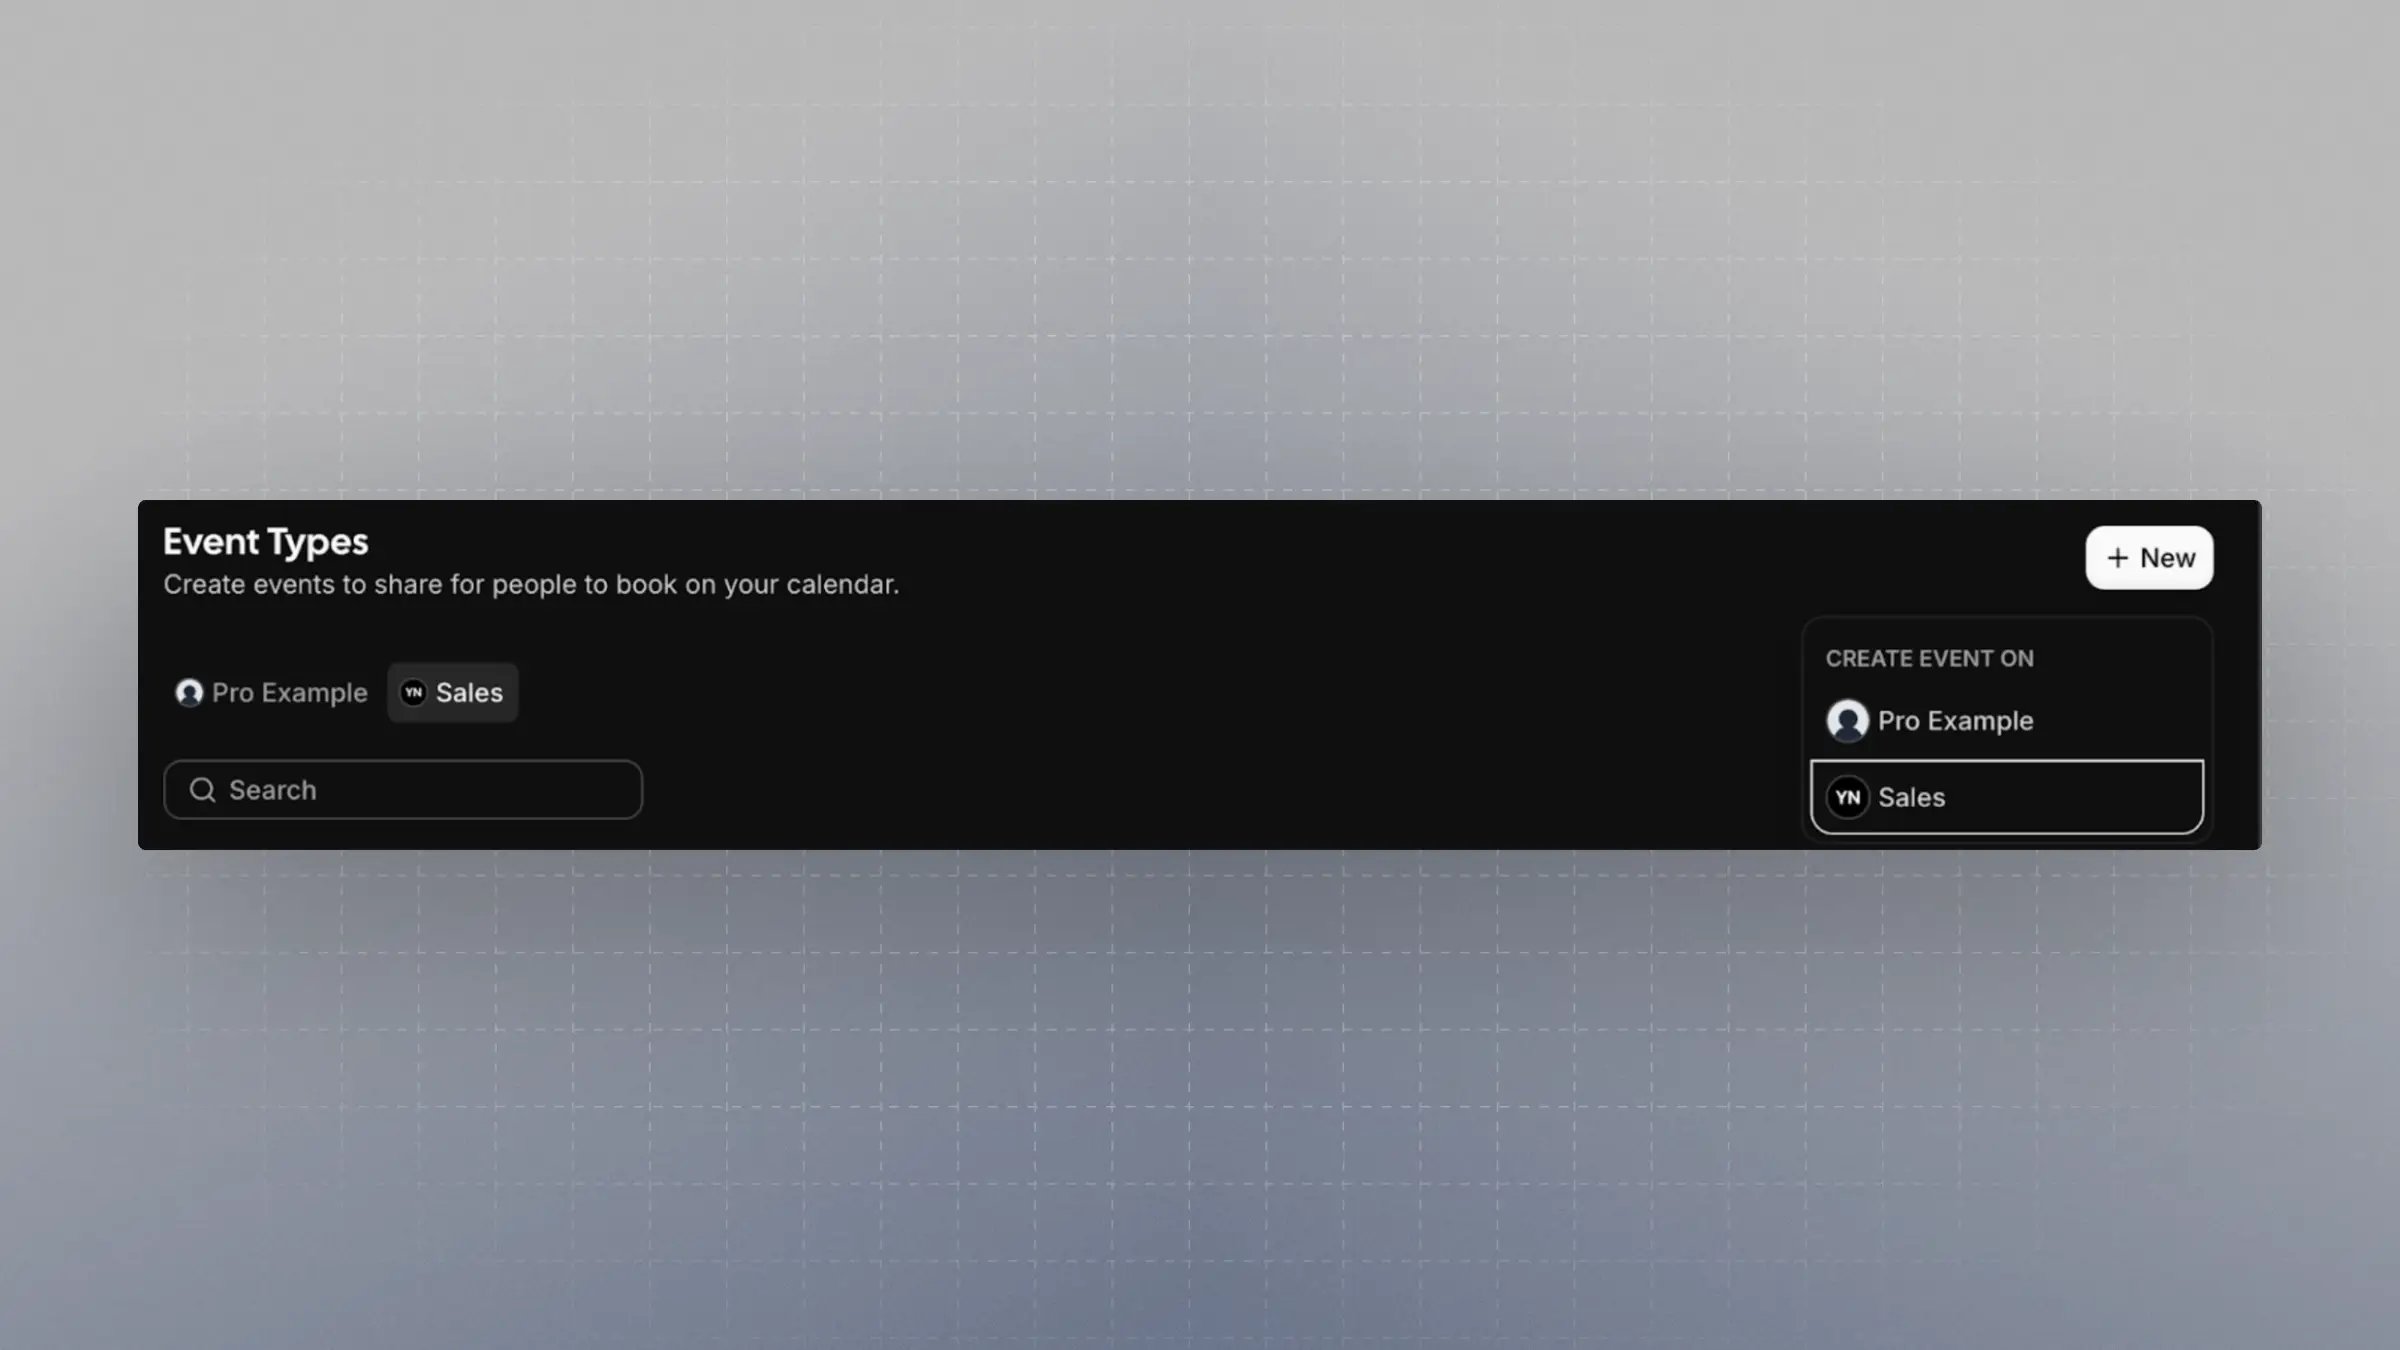
* Create this event under the team you just set up.
2. **Create a Round Robin Event Type**
* Create this event under the team you just set up.
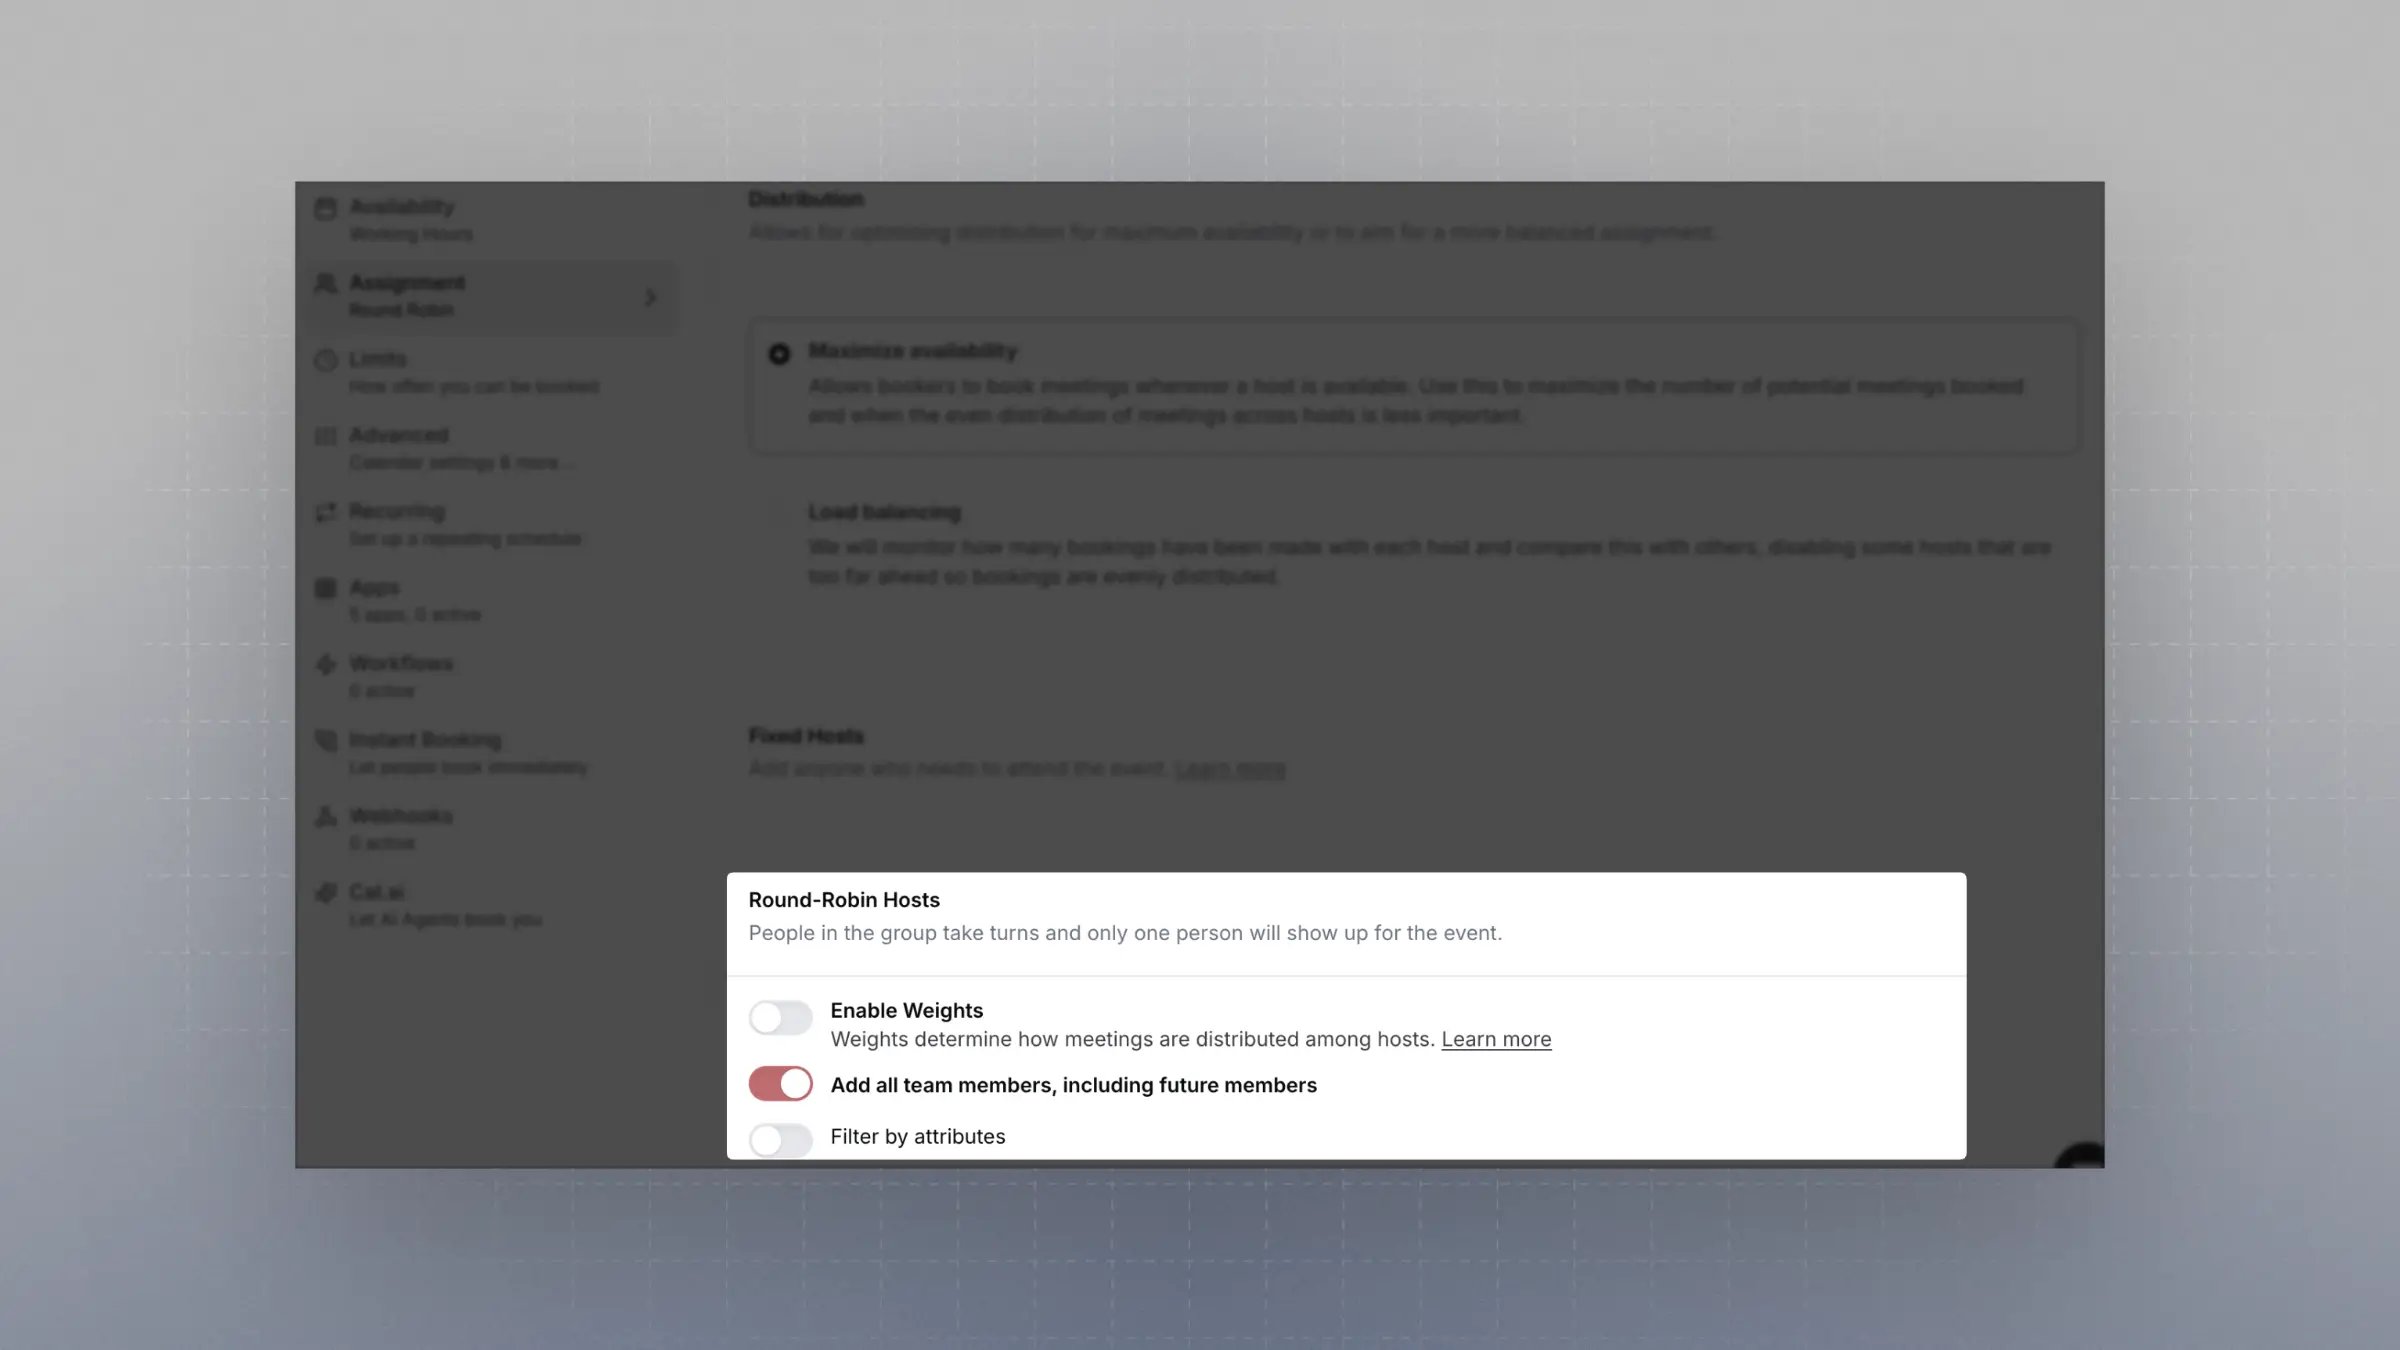
 * **Important**: Enable the setting `Add all team members, including future members`. This ensures team members are selected dynamically based on attributes.
 ***
## Creating an Attribute
Attributes let you define filters that team members can be matched against.
1. Go to [Organization Attributes](https://app.cal.com/settings/organizations/attributes)
2. Create one or more attributes.
* For matching use cases, **Multi Select** is a great option—especially when team members might belong to multiple attribute values.
* Example: Create an attribute with the name `Service (Attribute)` to clearly indicate it's used in attribute-based routing.
***
## Creating an Attribute
Attributes let you define filters that team members can be matched against.
1. Go to [Organization Attributes](https://app.cal.com/settings/organizations/attributes)
2. Create one or more attributes.
* For matching use cases, **Multi Select** is a great option—especially when team members might belong to multiple attribute values.
* Example: Create an attribute with the name `Service (Attribute)` to clearly indicate it's used in attribute-based routing.
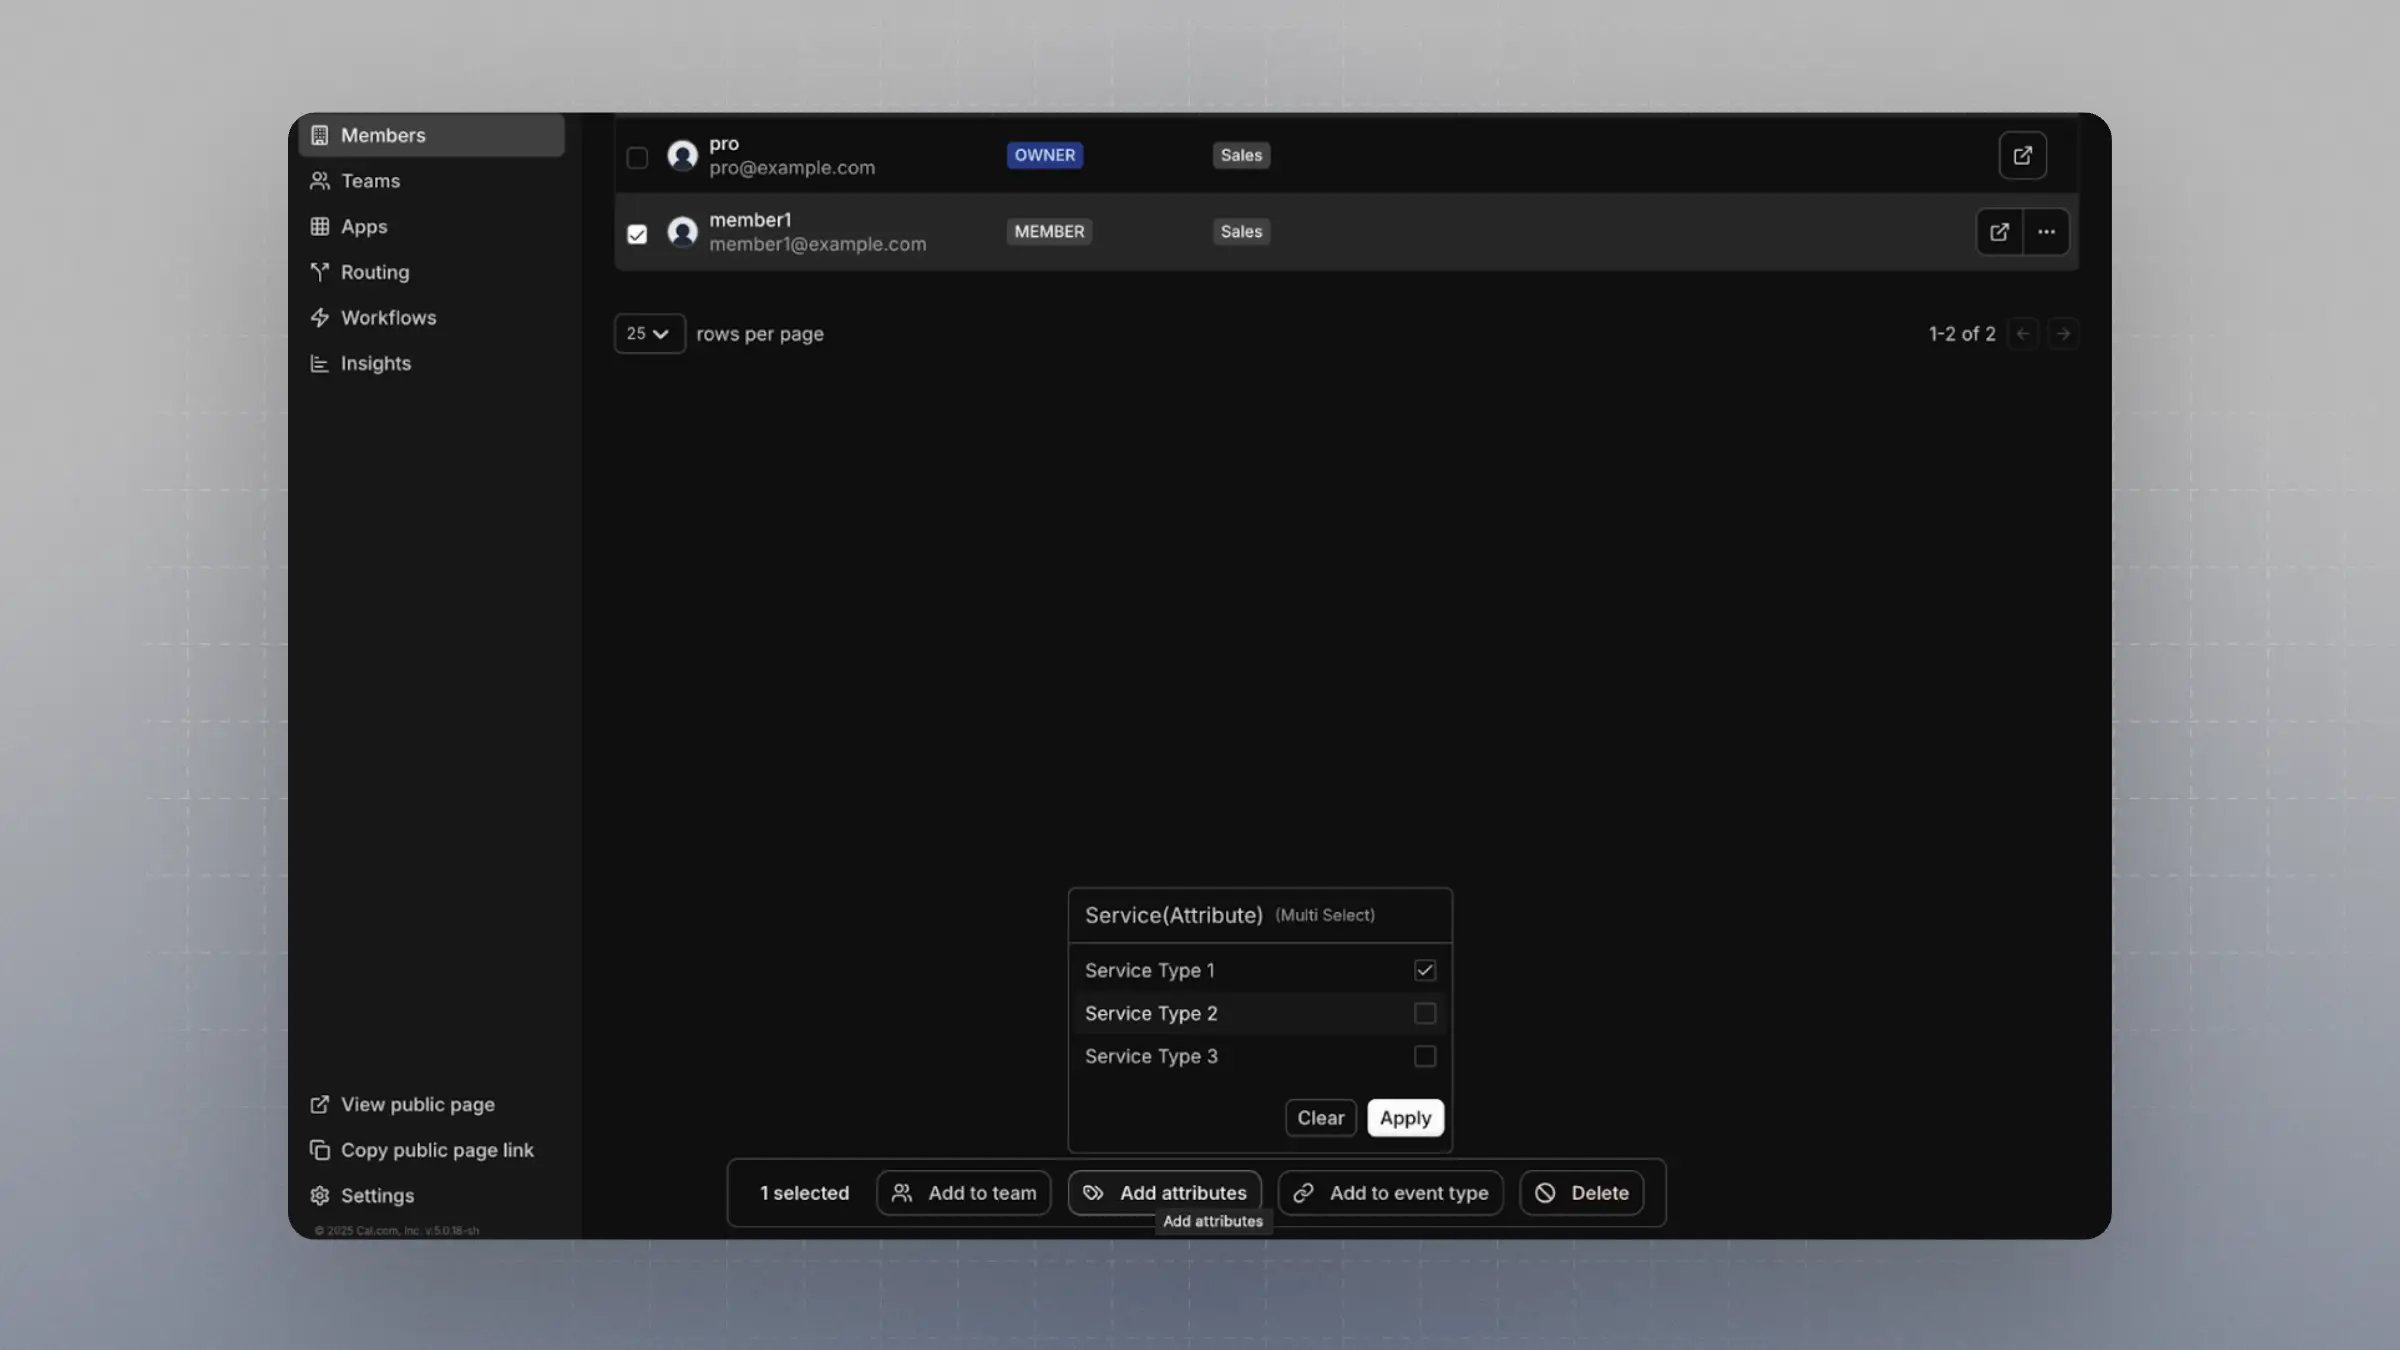
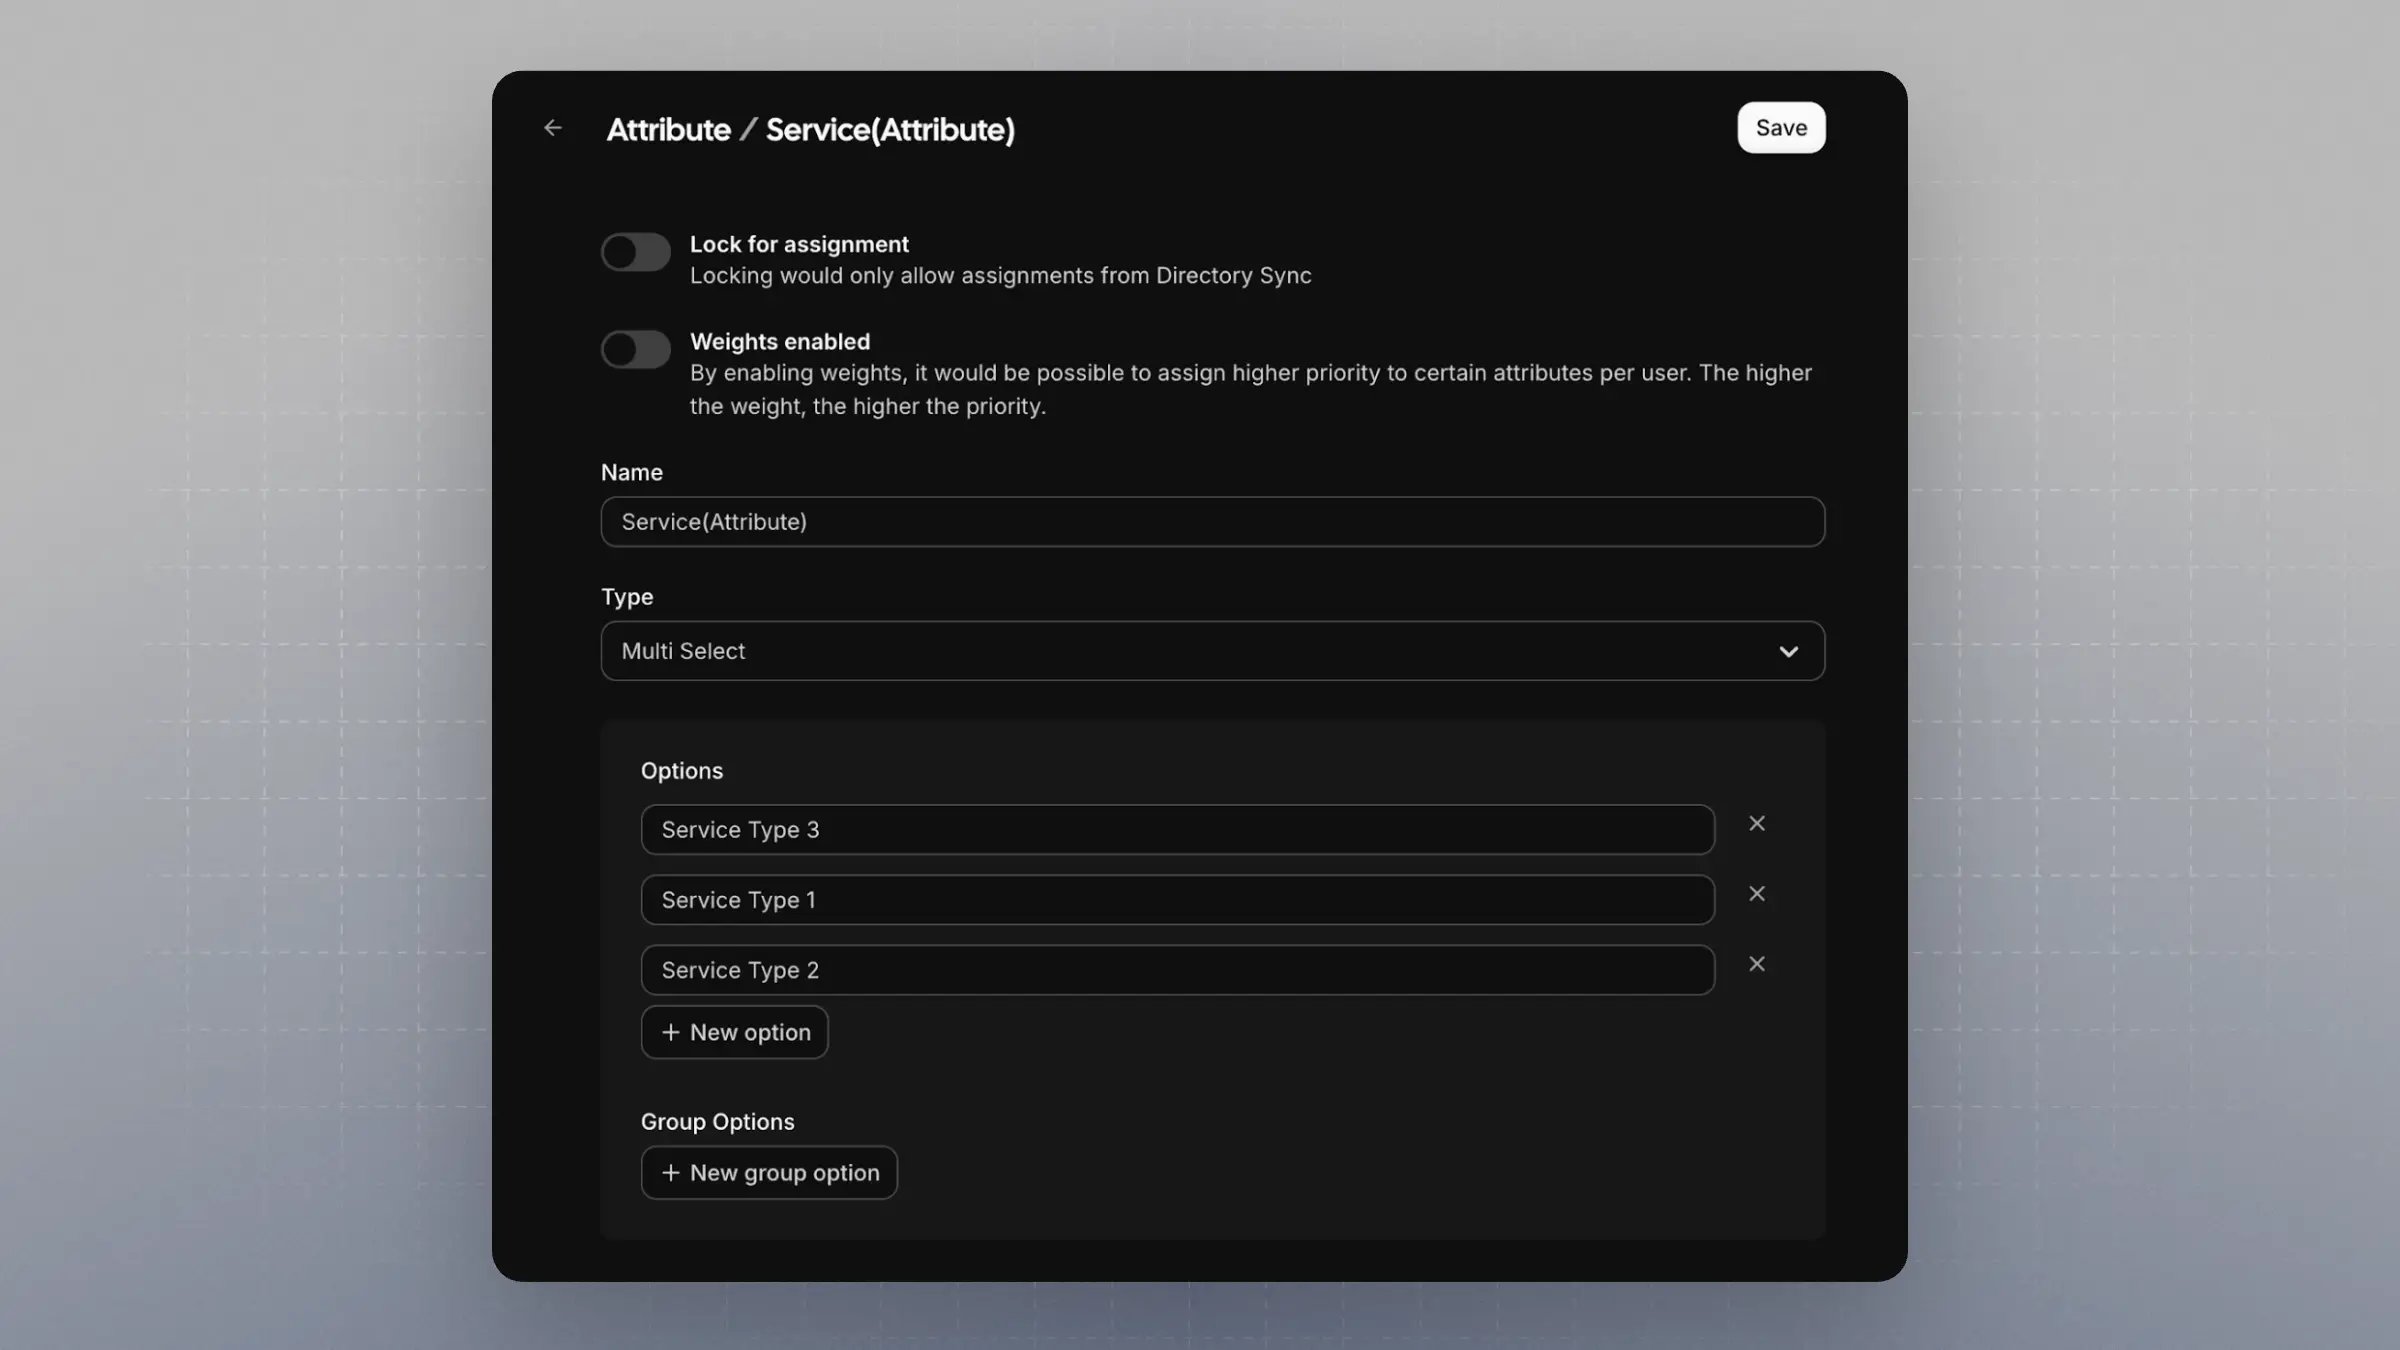 3. **Assign the attribute** to one or more team members. **This step is critical**.
 ***
## Setting Up a Routing Form
1. Navigate to [Routing Forms](https://app.cal.com/routing)
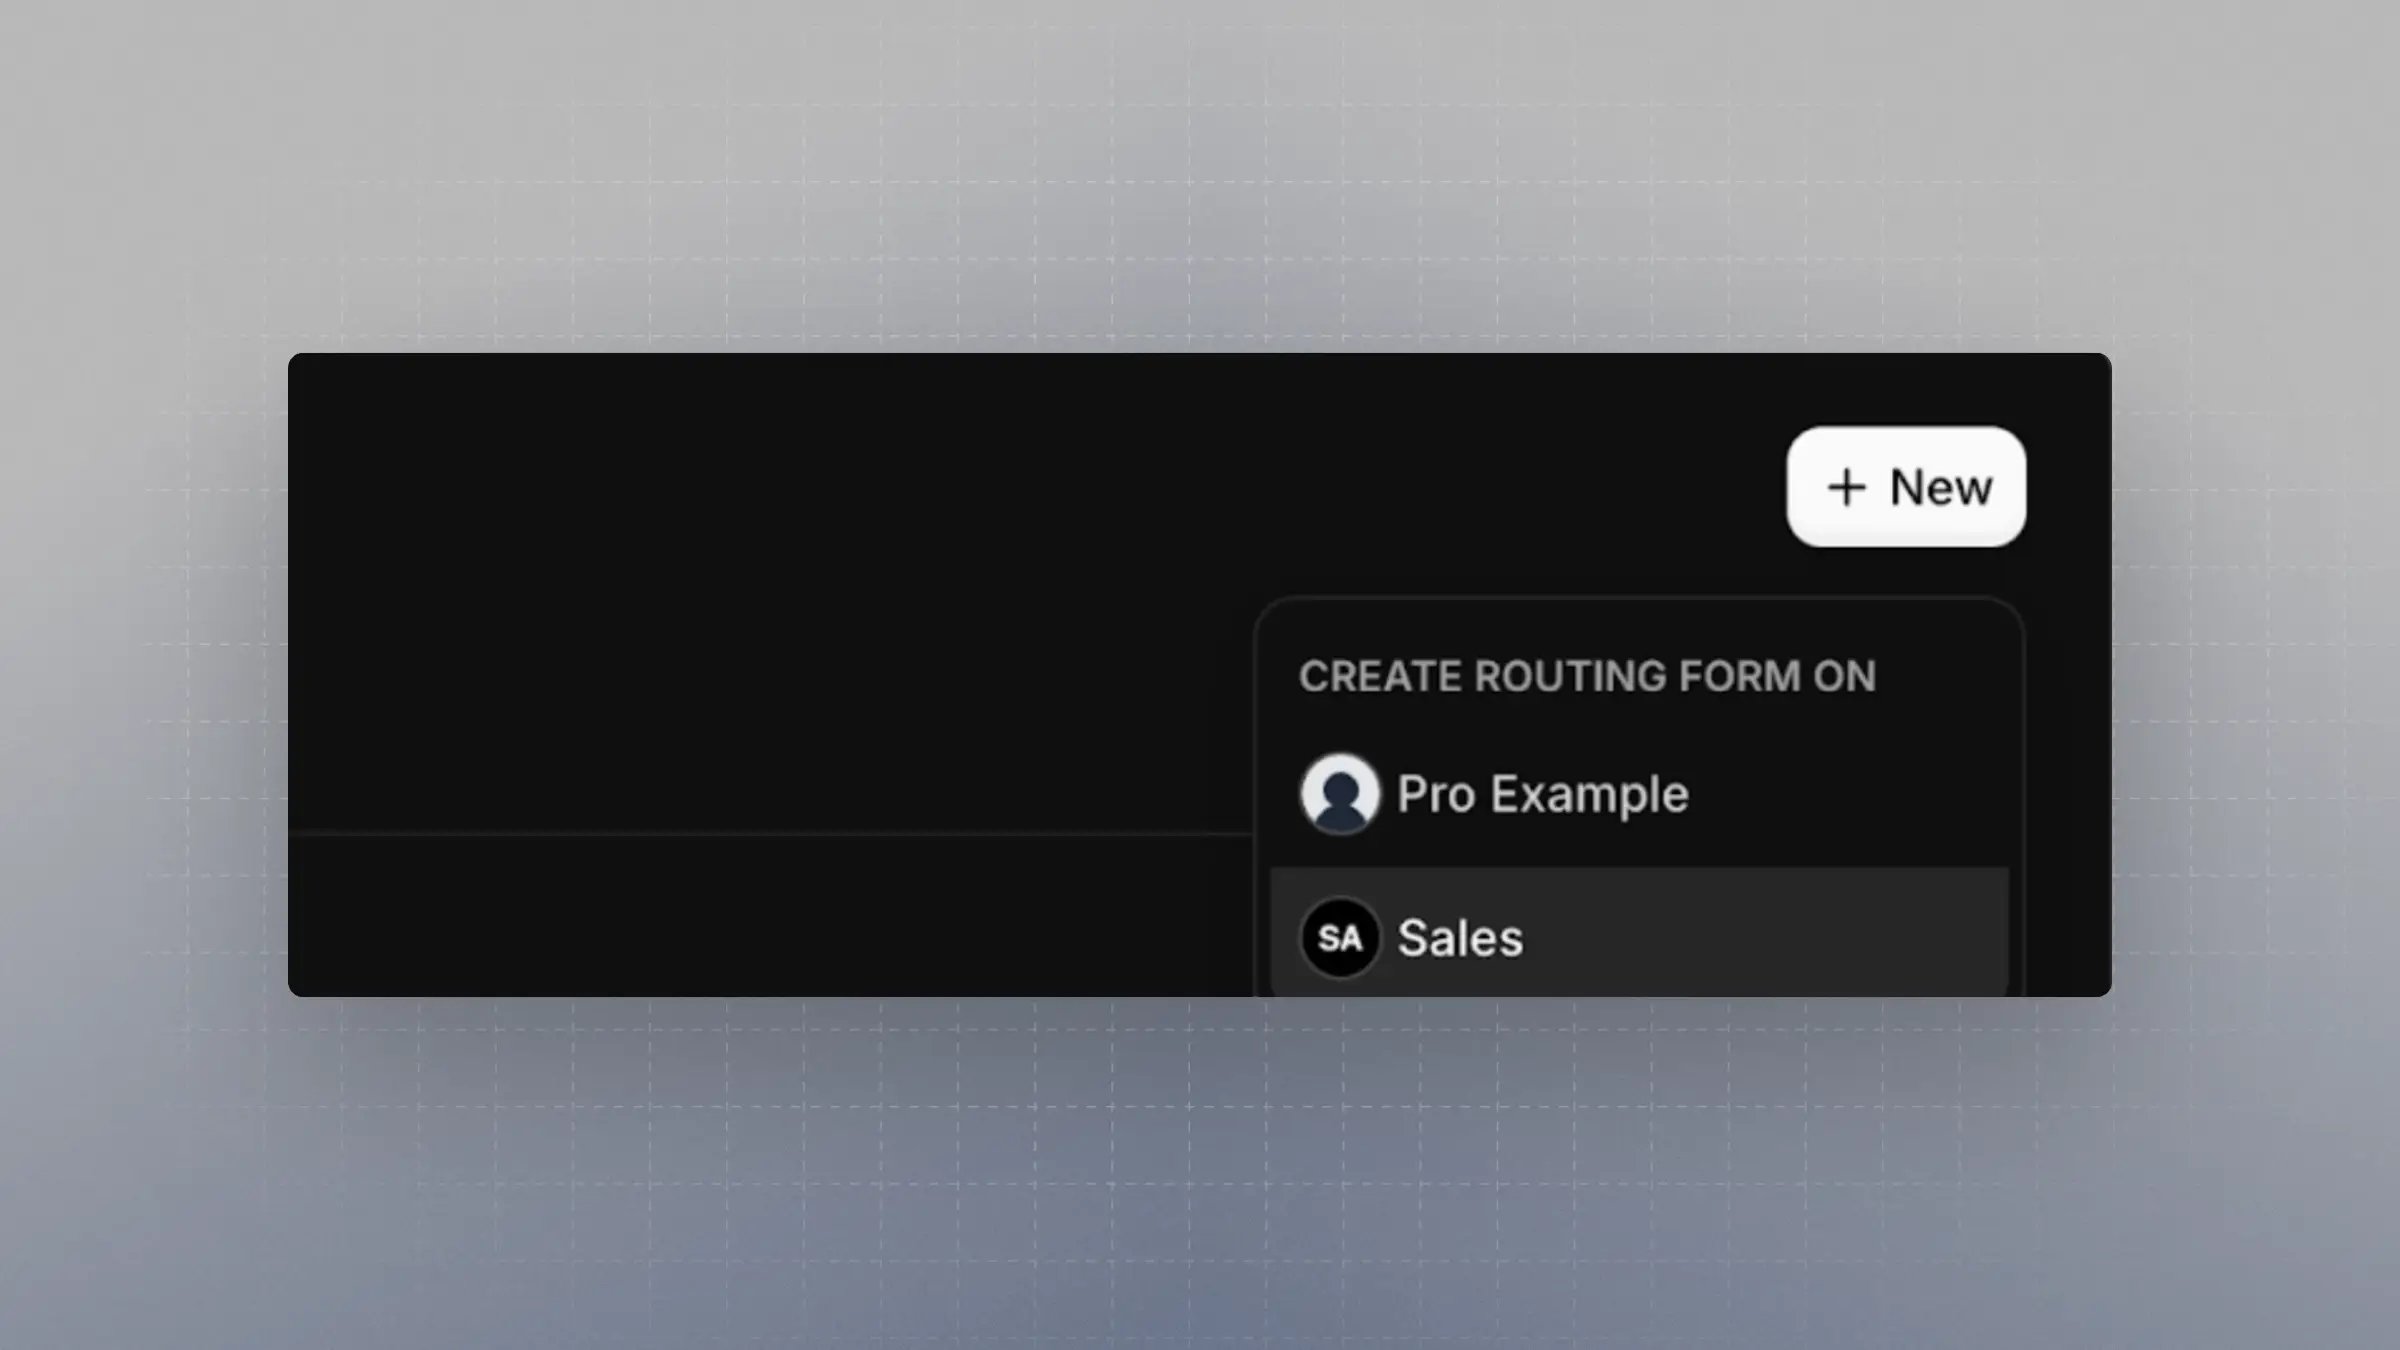
2. Create a new Routing Form **under the same team** as your event type.
***
## Setting Up a Routing Form
1. Navigate to [Routing Forms](https://app.cal.com/routing)
2. Create a new Routing Form **under the same team** as your event type.
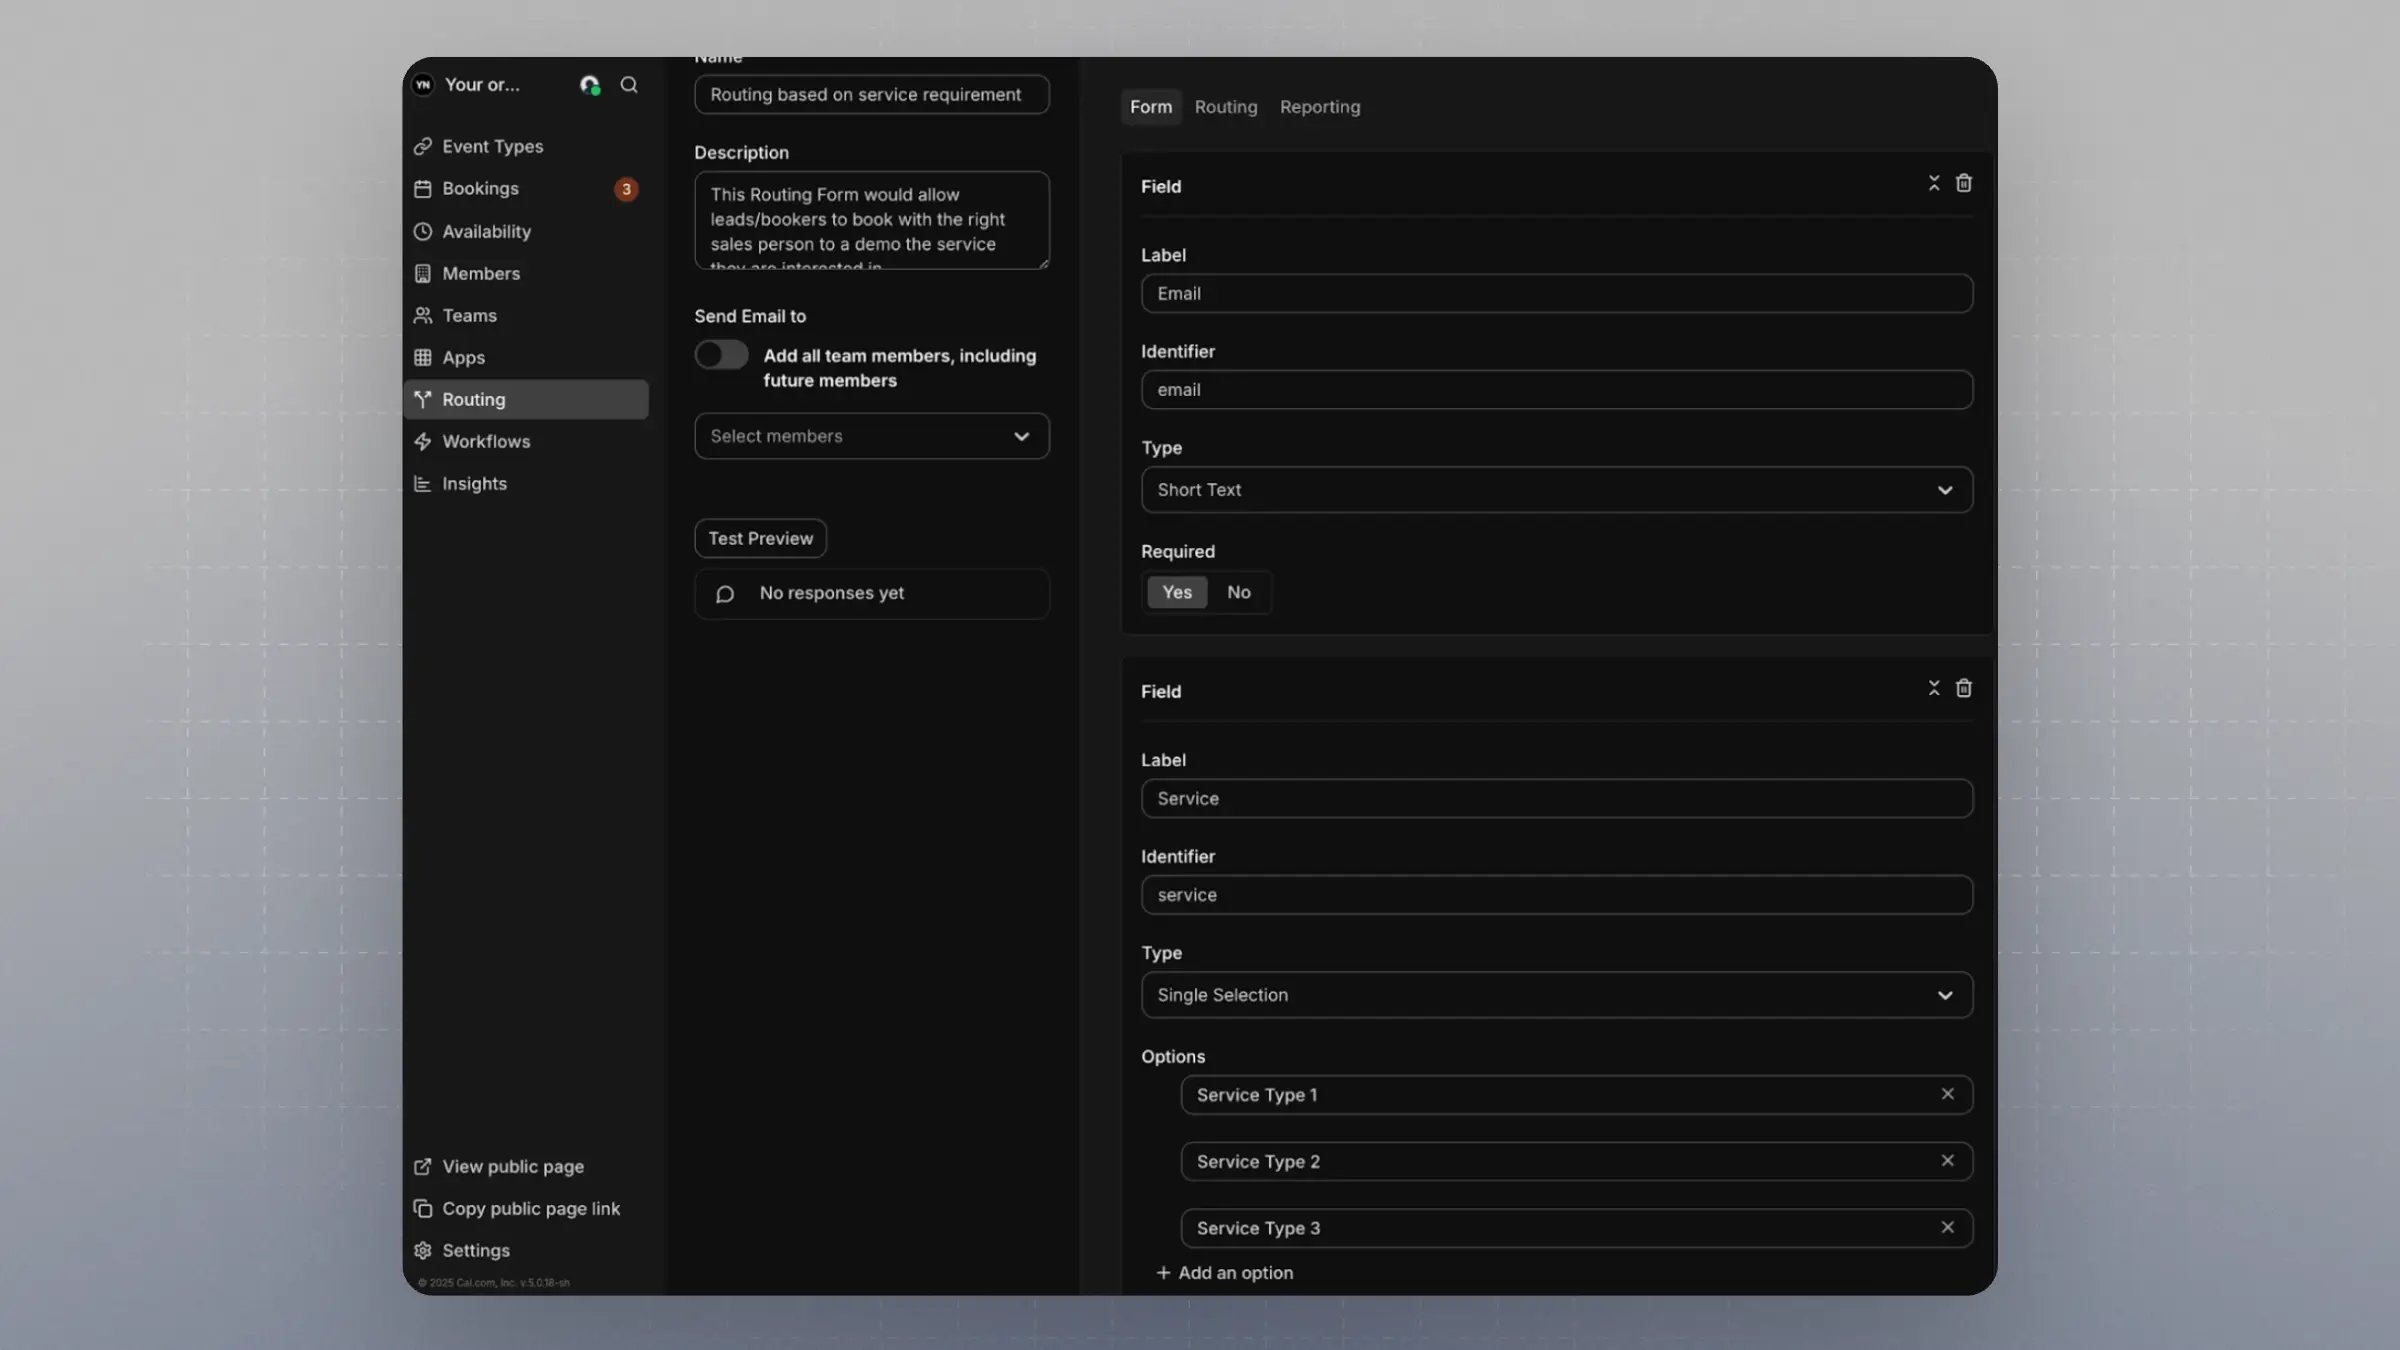
 3. Add fields that you want bookers to fill out.
* It's recommended to include an `Email` field with the identifier `email` to enable integrations with CRMs and contact lookup tools.
* Refer to [this guide](https://cal.com/help/apps-and-integrations/assign-people#option-2-based-on-emails) for more.
4. Create another field that matches the **options** from the attribute you set up.
* The **name and identifier don't have to match** the attribute name.
* Example: A `Service` field with identifier `service`, where the options are identical to those in `Service (Attribute)`.
3. Add fields that you want bookers to fill out.
* It's recommended to include an `Email` field with the identifier `email` to enable integrations with CRMs and contact lookup tools.
* Refer to [this guide](https://cal.com/help/apps-and-integrations/assign-people#option-2-based-on-emails) for more.
4. Create another field that matches the **options** from the attribute you set up.
* The **name and identifier don't have to match** the attribute name.
* Example: A `Service` field with identifier `service`, where the options are identical to those in `Service (Attribute)`.
 ***
## Connecting the RR Team Event, Attributes, and Routing Form
1. In your Routing Form, go to the **Routing** tab
2. Click `Add a new Route`
3. Link the Routing Form field to the corresponding Attribute
* For example, connect the `Service (Attribute)` to the `Service` field in your Routing Form
***
## Connecting the RR Team Event, Attributes, and Routing Form
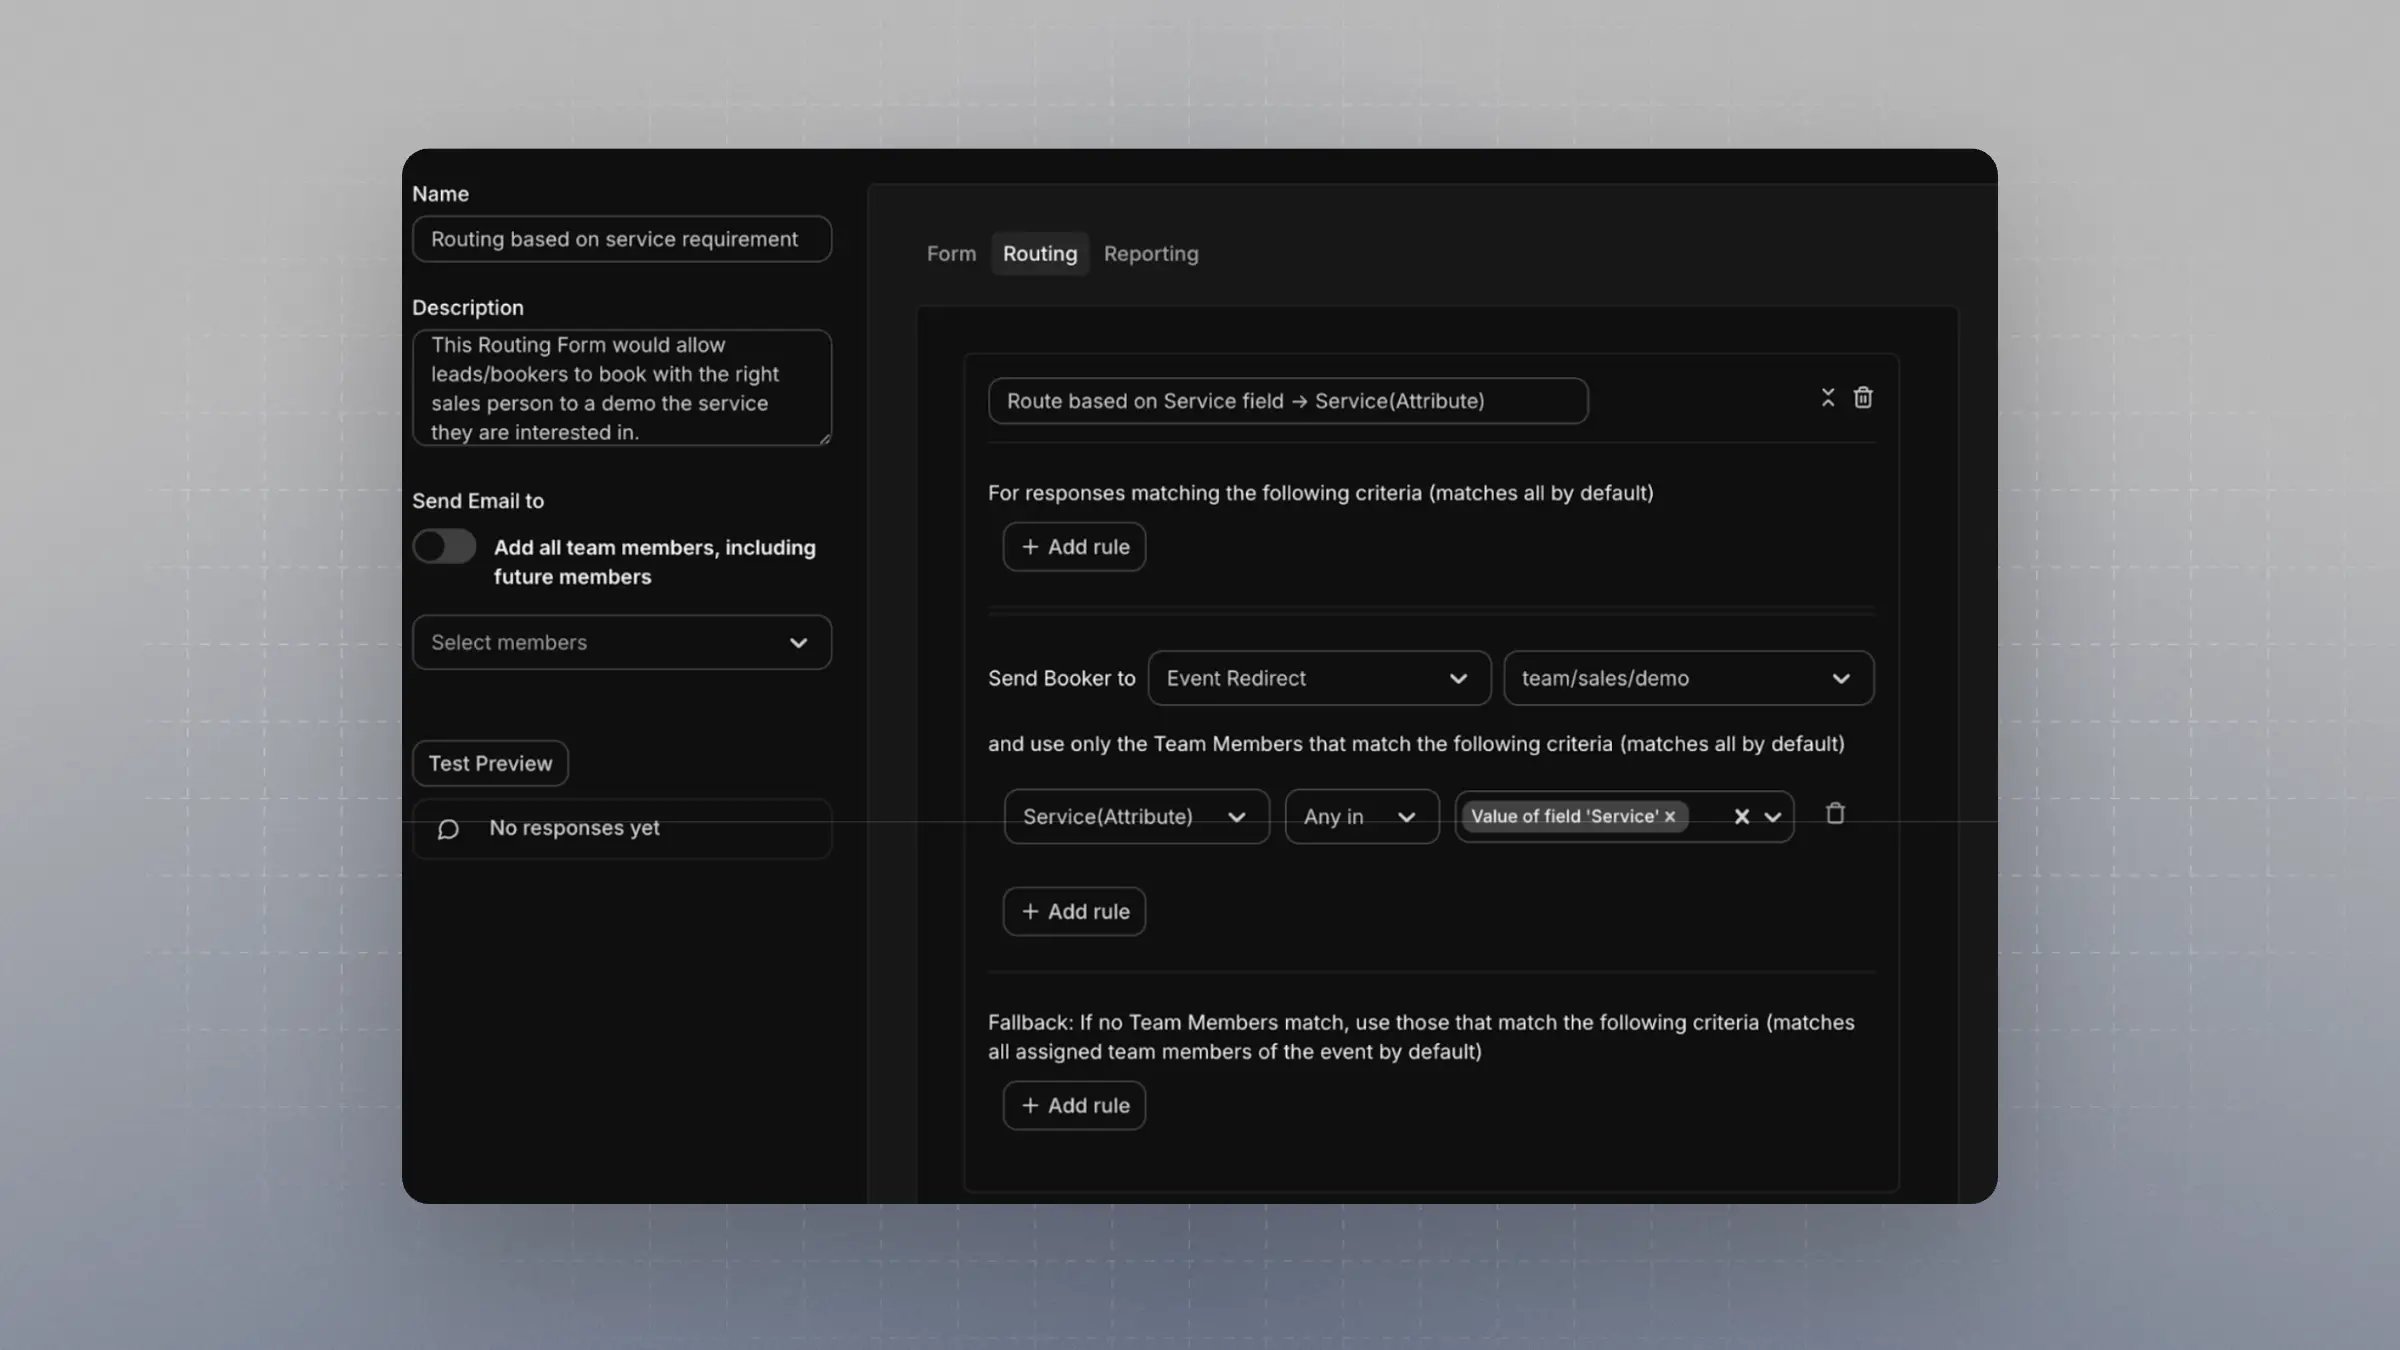
1. In your Routing Form, go to the **Routing** tab
2. Click `Add a new Route`
3. Link the Routing Form field to the corresponding Attribute
* For example, connect the `Service (Attribute)` to the `Service` field in your Routing Form
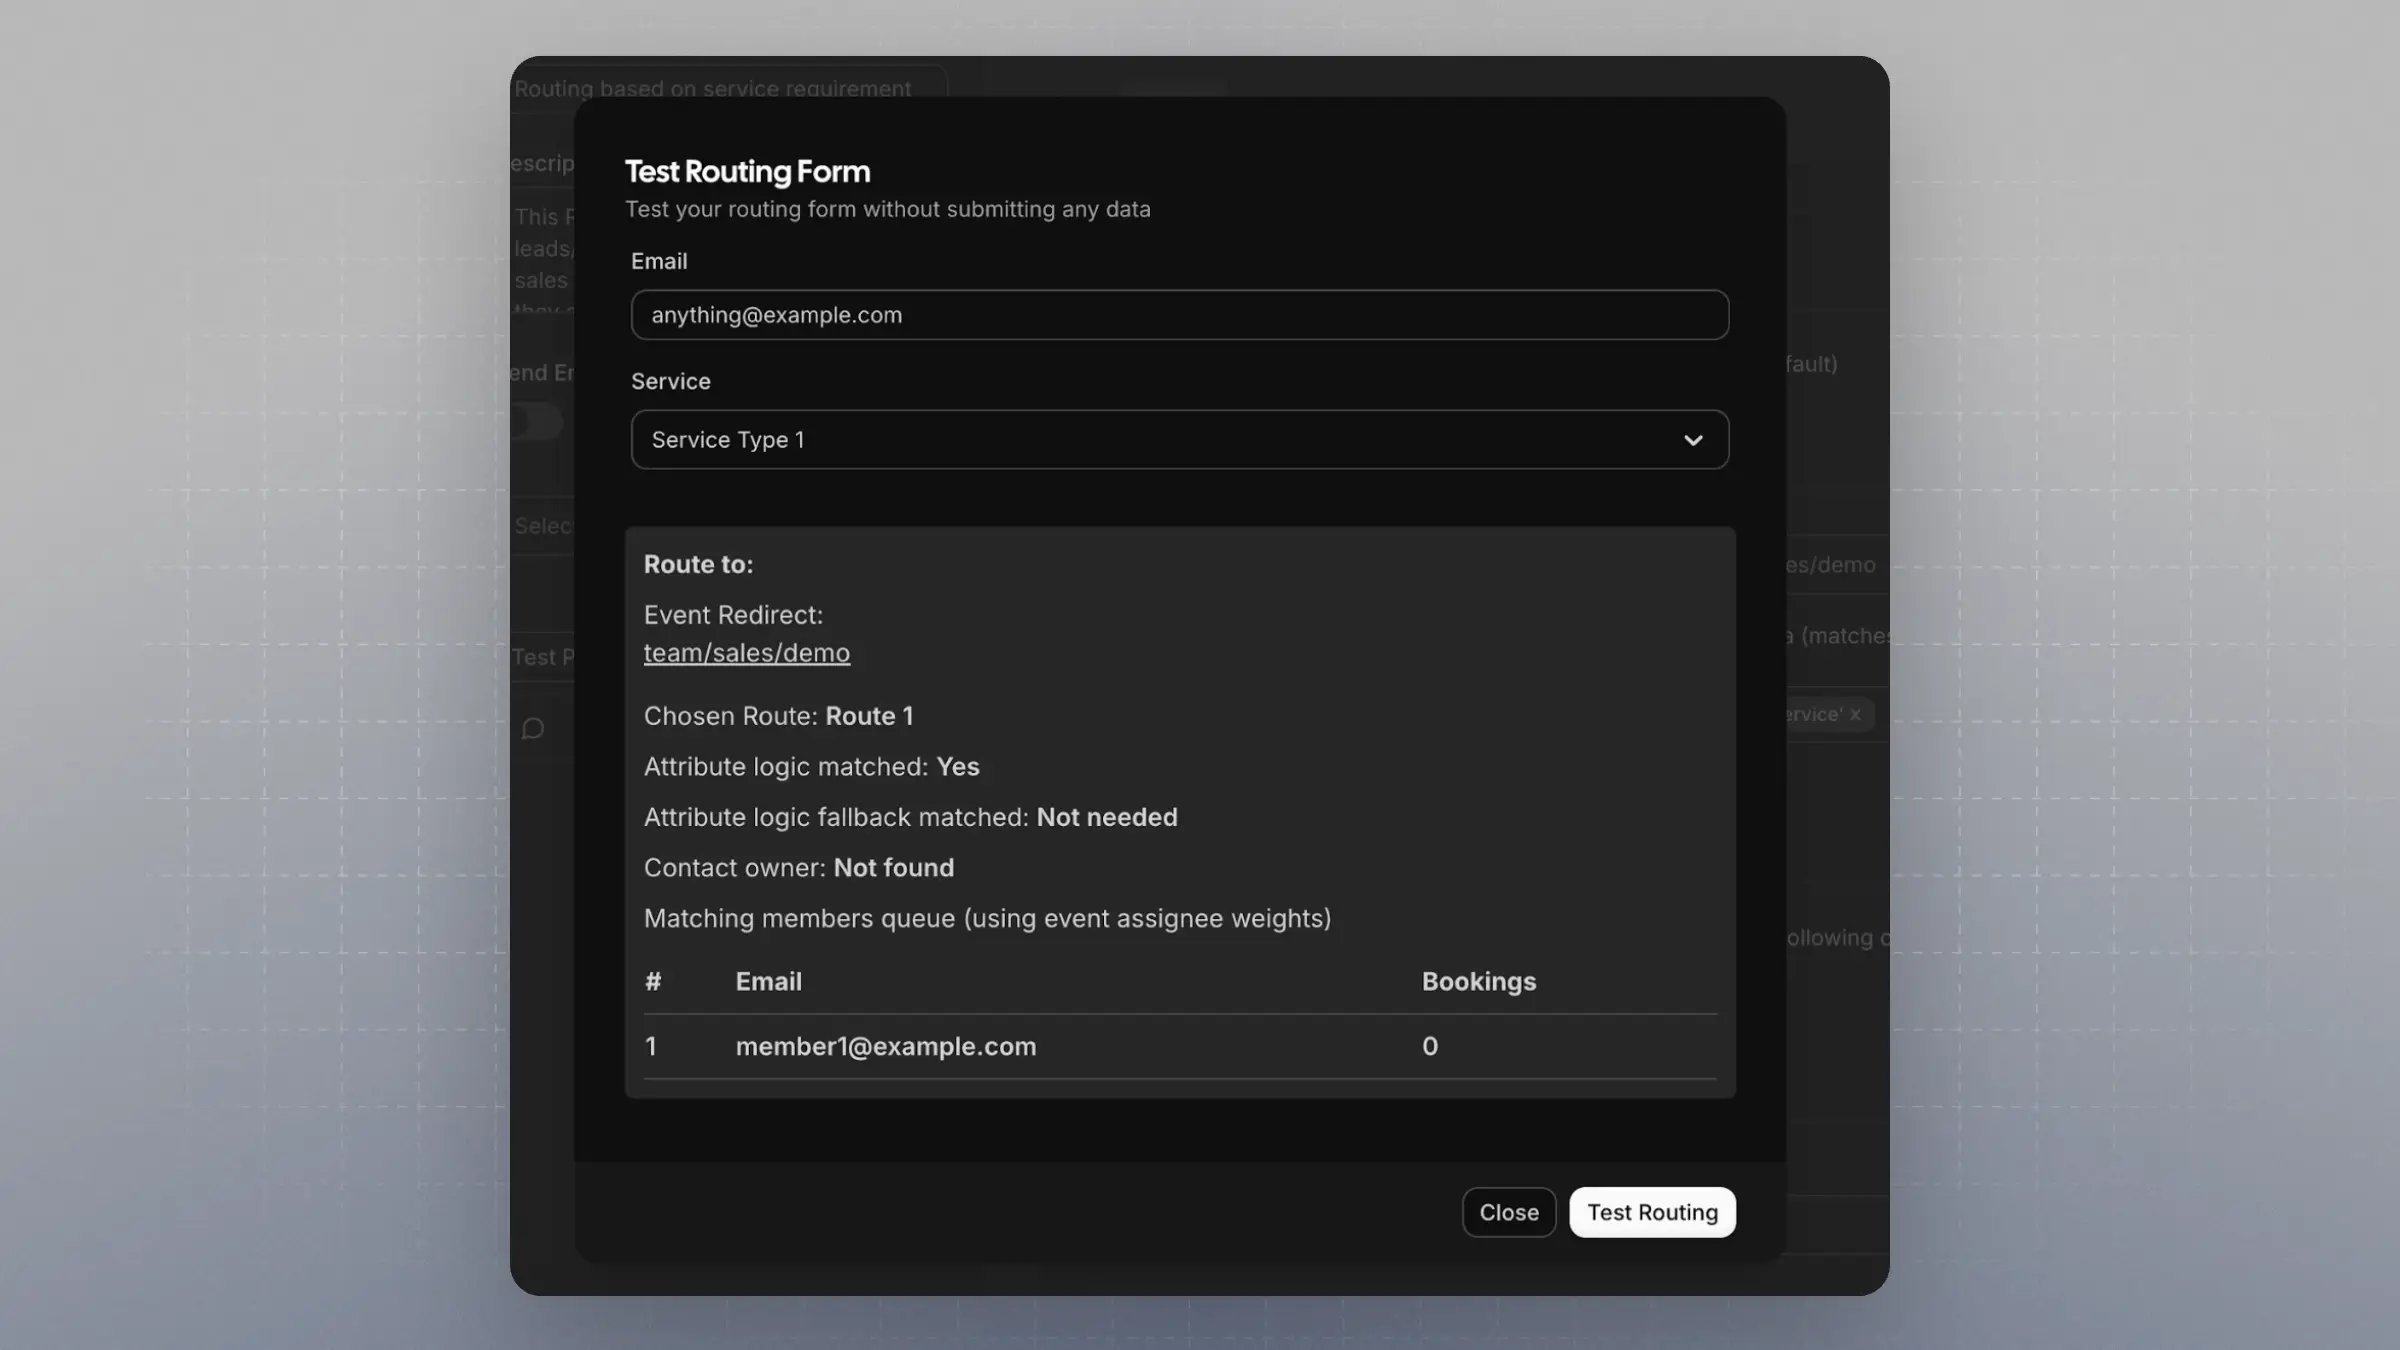
 4. Click **Test Preview** on the left
* Input a value that exists in both the Routing Form field and the Attribute
* The system should now route the booking to a team member with that value assigned in their attributes
4. Click **Test Preview** on the left
* Input a value that exists in both the Routing Form field and the Attribute
* The system should now route the booking to a team member with that value assigned in their attributes
 ***
## Sending Leads or Visitors to the Router
There are two ways to use the Routing setup for collecting bookings:
### 1. Using the Cal.com Routing Form Public Page
* You can find the public link for your Routing Form in the UI
***
## Sending Leads or Visitors to the Router
There are two ways to use the Routing setup for collecting bookings:
### 1. Using the Cal.com Routing Form Public Page
* You can find the public link for your Routing Form in the UI
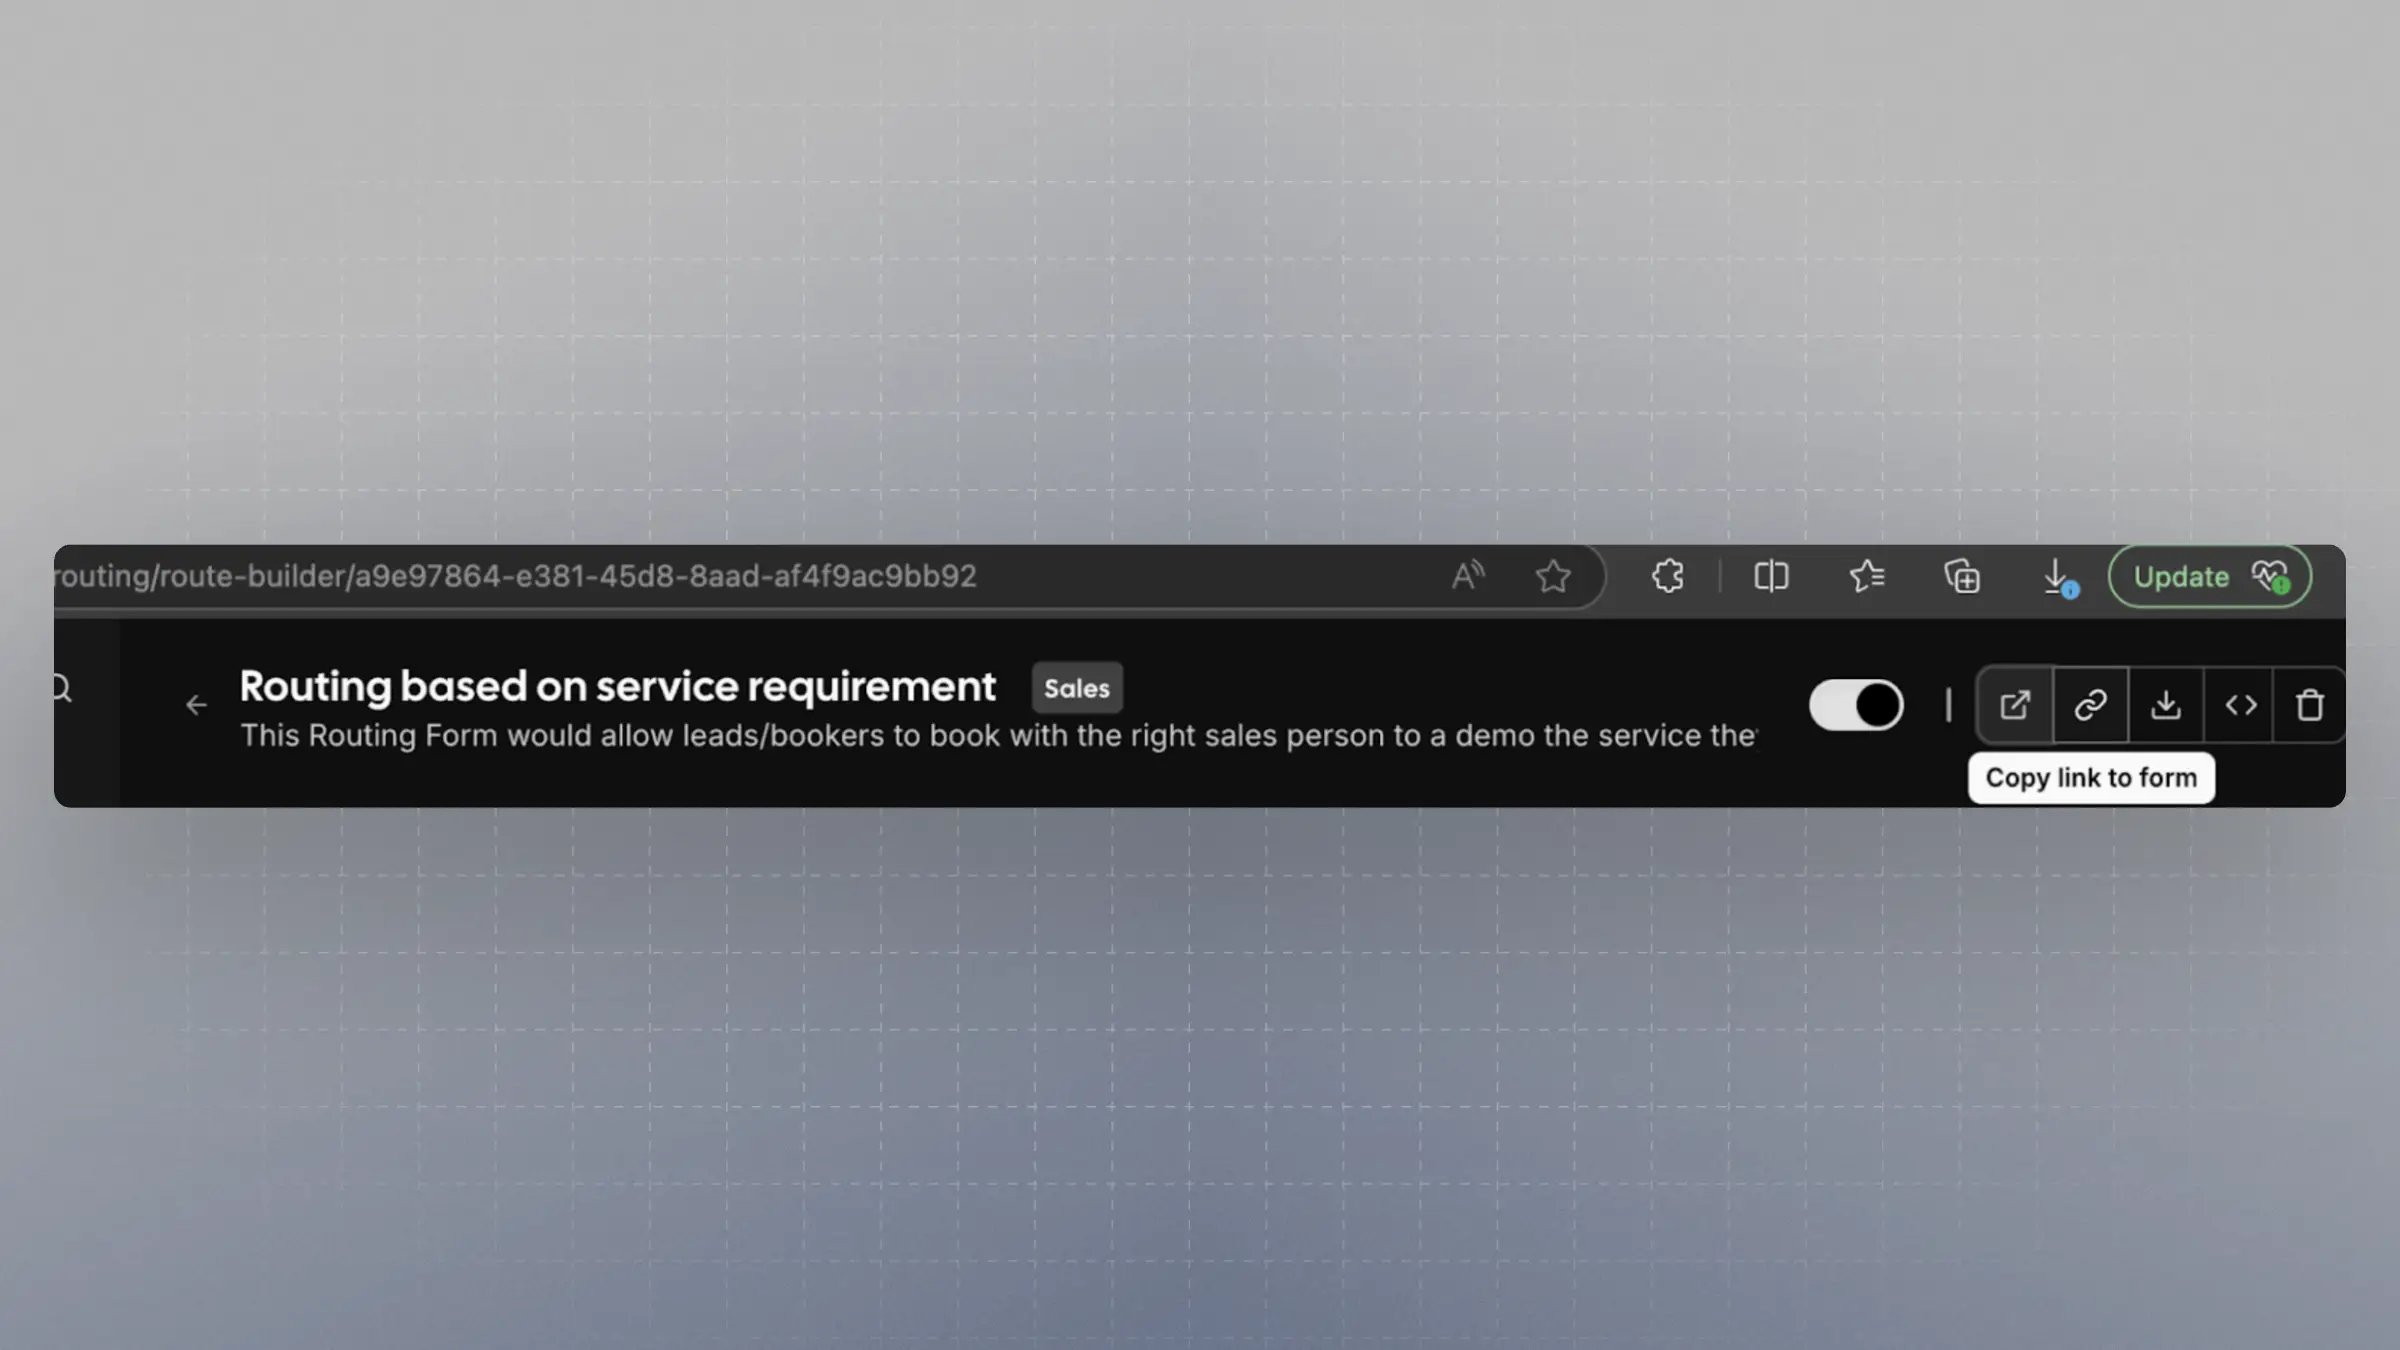 * The URL will look like:
```
app.cal.com/forms/{FORM_ID}
```
Share this link with your leads or embed it in your site.
* The URL will look like:
```
app.cal.com/forms/{FORM_ID}
```
Share this link with your leads or embed it in your site.
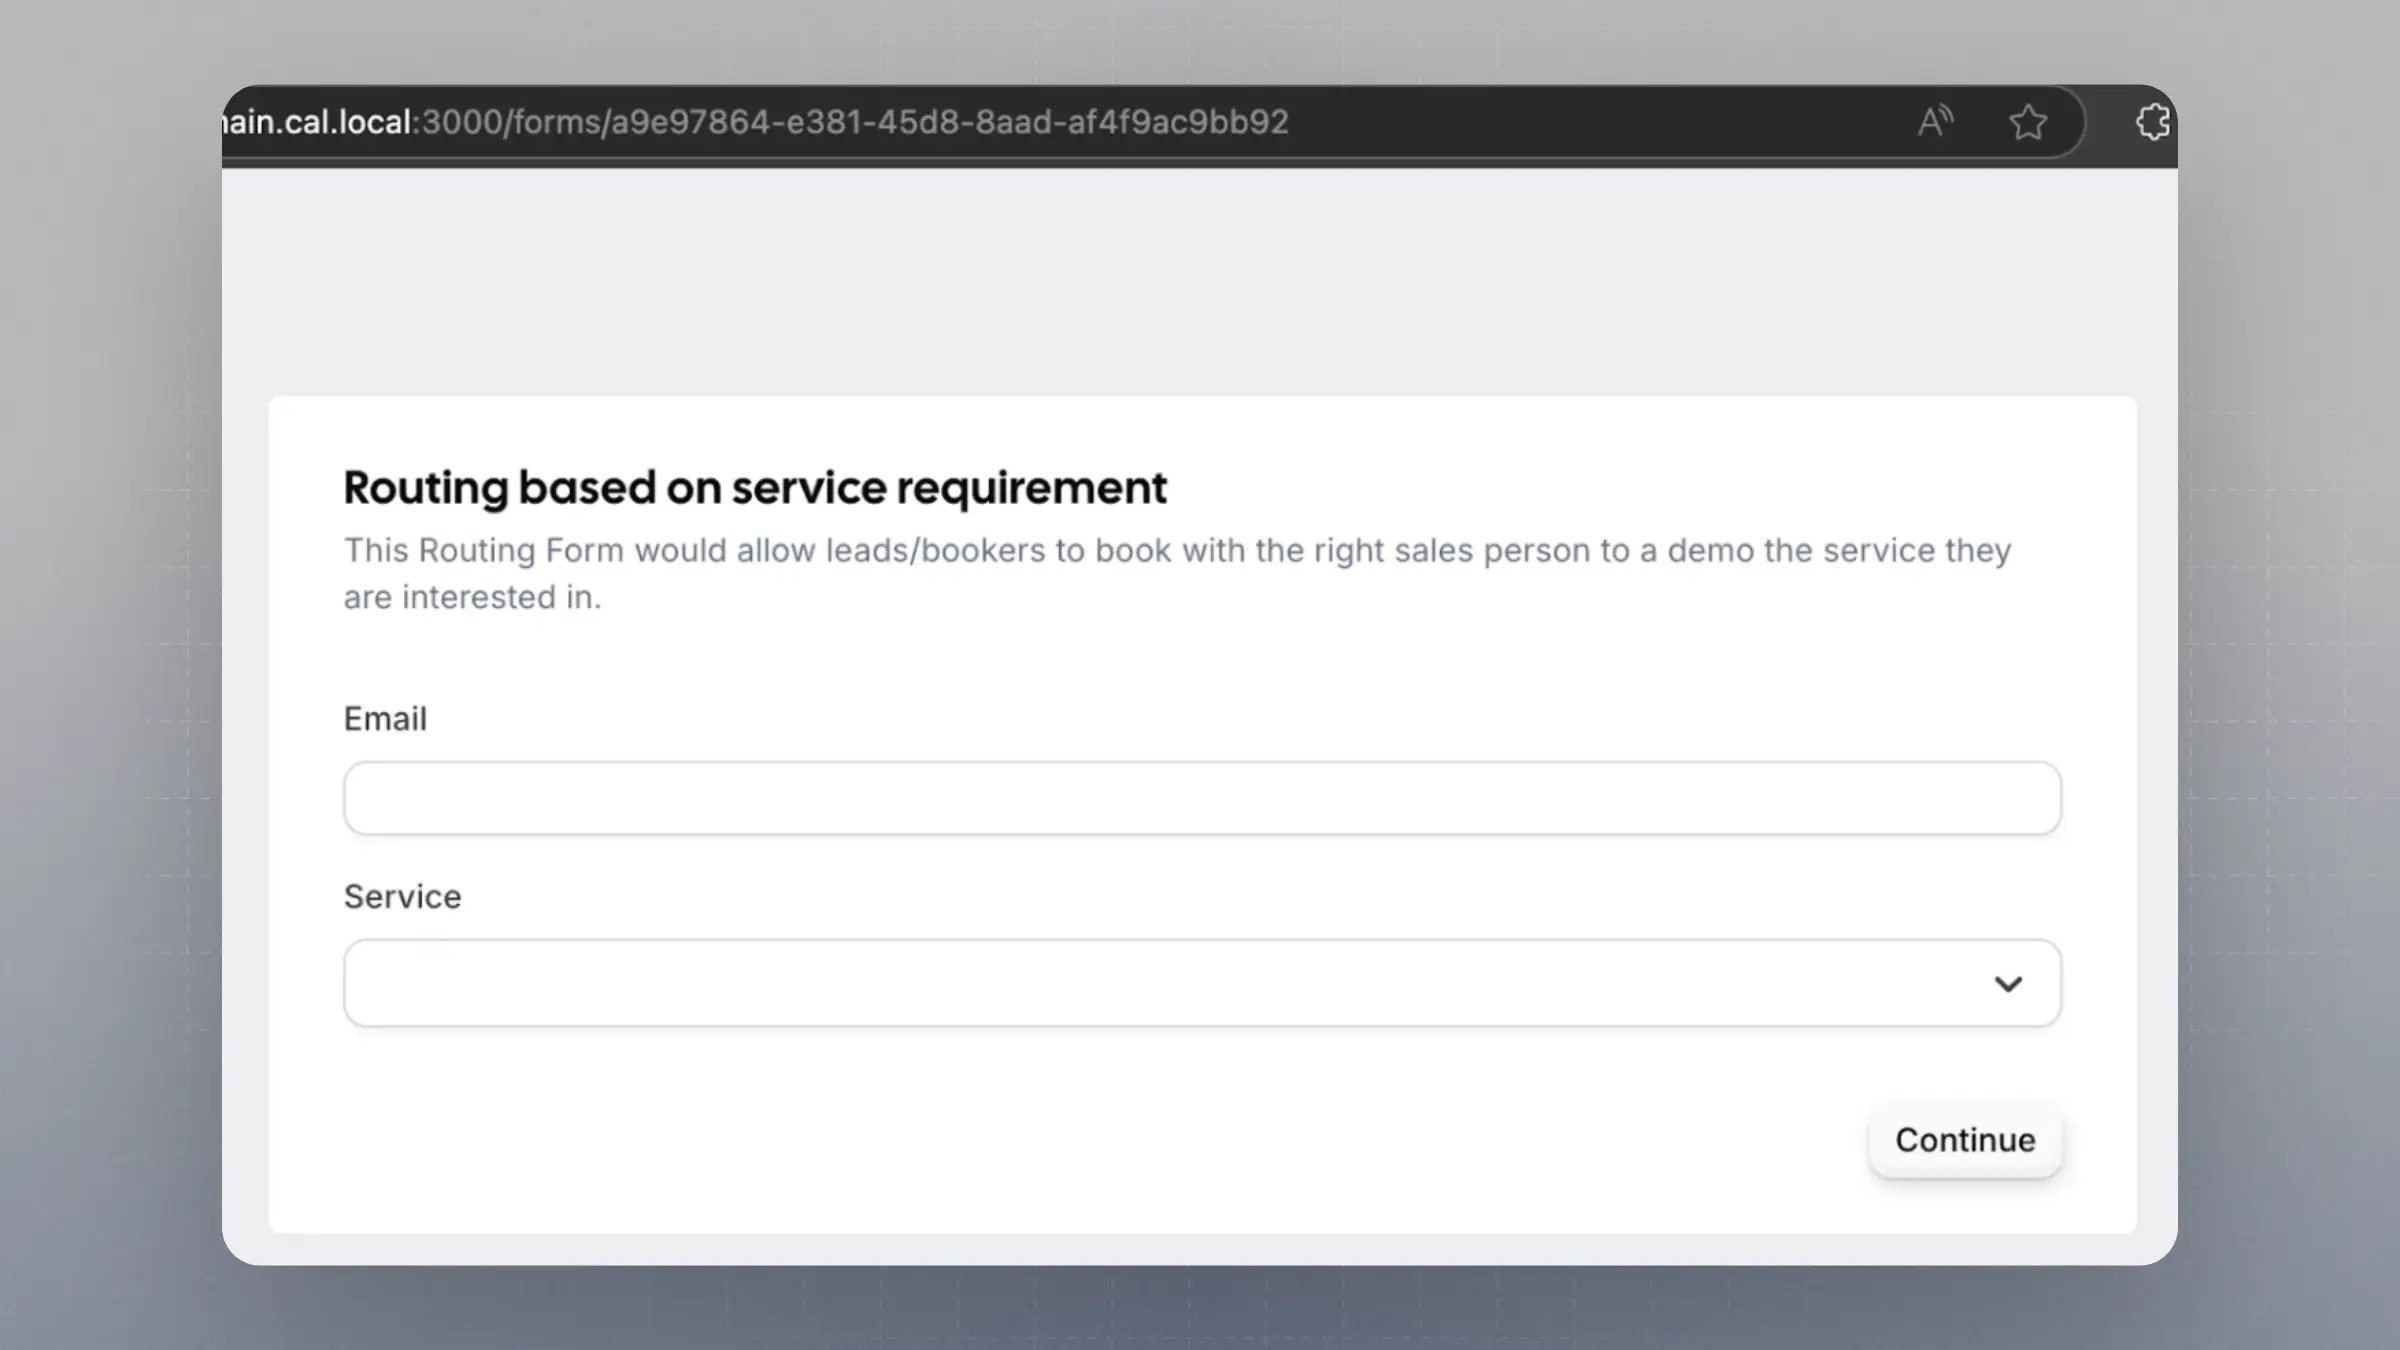 ### 2. Using Your Own Form with Headless Router (Embed Mode)
If you prefer to design your own form UI but still leverage Cal.com routing:
* Use the Headless Router endpoint:
```
/router?form={FORM_ID}&service=Service%20Type%201&email=jane@example.com
```
* The field identifiers become query params in the URL
* Cal.com will handle the routing and direct the user to the appropriate booking page
This gives you full control over your form UI while keeping Cal.com as the routing engine.
**[Learn more about implementing Headless Routing →](/routing/headless-routing)**
***
You’ve now set up a powerful attribute-based Round Robin routing system that integrates seamlessly with your team structure and forms.
### 2. Using Your Own Form with Headless Router (Embed Mode)
If you prefer to design your own form UI but still leverage Cal.com routing:
* Use the Headless Router endpoint:
```
/router?form={FORM_ID}&service=Service%20Type%201&email=jane@example.com
```
* The field identifiers become query params in the URL
* Cal.com will handle the routing and direct the user to the appropriate booking page
This gives you full control over your form UI while keeping Cal.com as the routing engine.
**[Learn more about implementing Headless Routing →](/routing/headless-routing)**
***
You’ve now set up a powerful attribute-based Round Robin routing system that integrates seamlessly with your team structure and forms.